Simple-Simon, The Smart Work Order App
Management – At the office – The Office Module
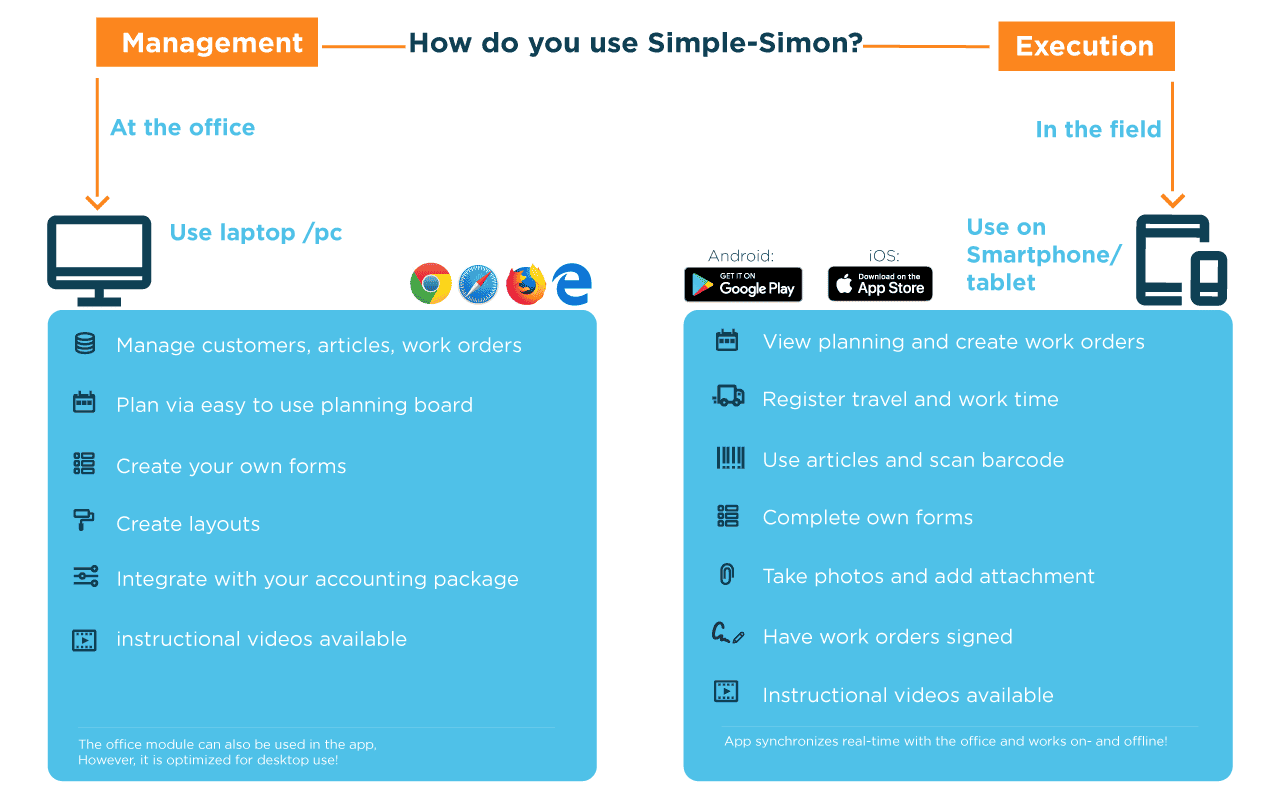
Creating a digital work order is not difficult with Simple-Simon. Simple-Simon consists of an Office Module and an App. The office employees can create the work orders in the Office module and schedule them in the calendar of the fieldservices. Basic data such as customers, articles & work addresses can be managed with the Office Module. The Office Module works real-time with the Simon App.
Implementation – In the field – Simon App
When the fieldservices log in to the Simon App, they can select the planned work orders and start working on the work order. The travel/working hours are immediately tracked. If desired, they can also create work orders along the way.
Below, you can read more information about using the Office Module and the app, and make your 1st work order.
Simon Office Module – Create your first work order (short description)
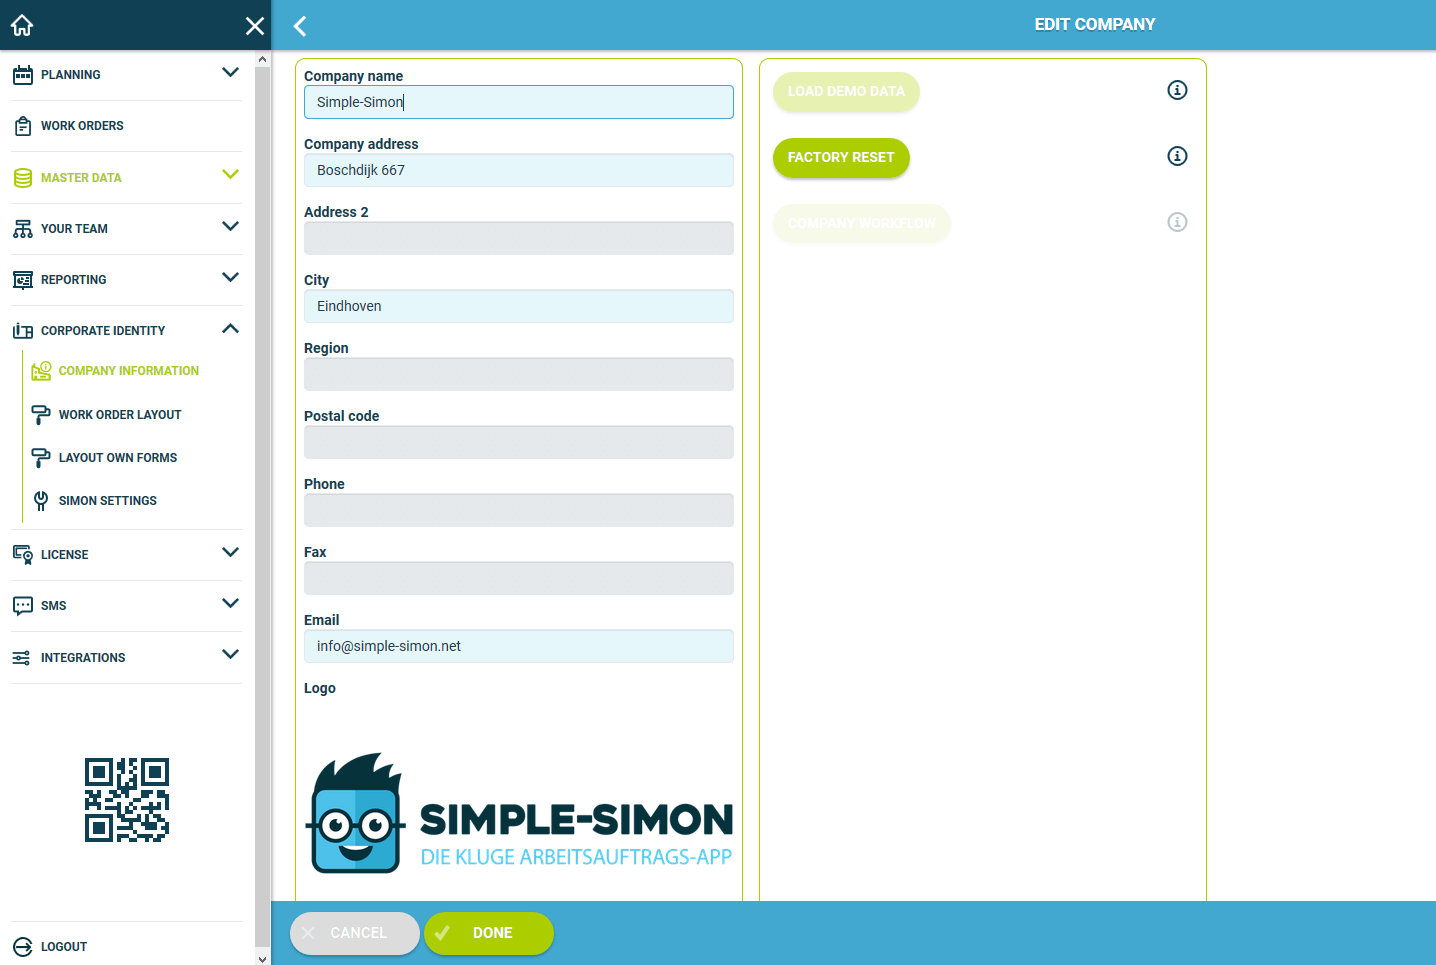
1. Create your company profile.
Go to Corporate Identity -> Company Information. Add your logo and company information.
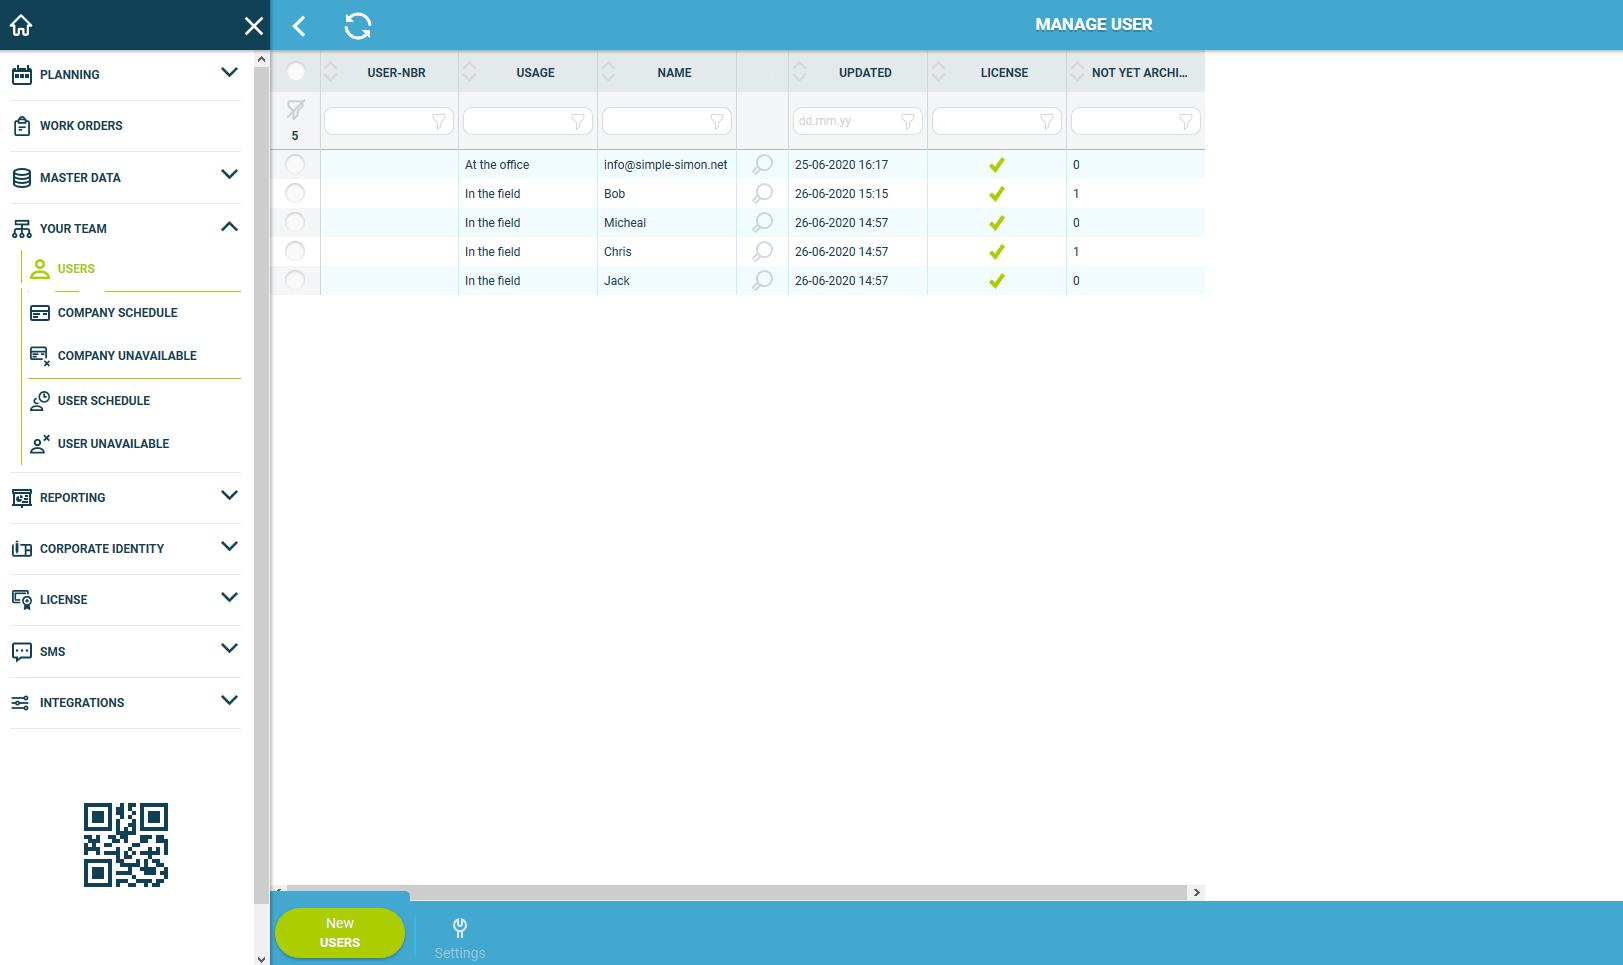
2. Assemble your team.
Go to your team -> User -> New user and fill in the required fields. You can choose between “In the field” or “At the office” user. The “In the field” user is your fieldservice employee who uses the Simple-Simon App and can handle his work orders from there. The “At the office” user can log in via any browser and has access to the office module you are currently in.
Download the Simon App from the Appstore or the Playstore.
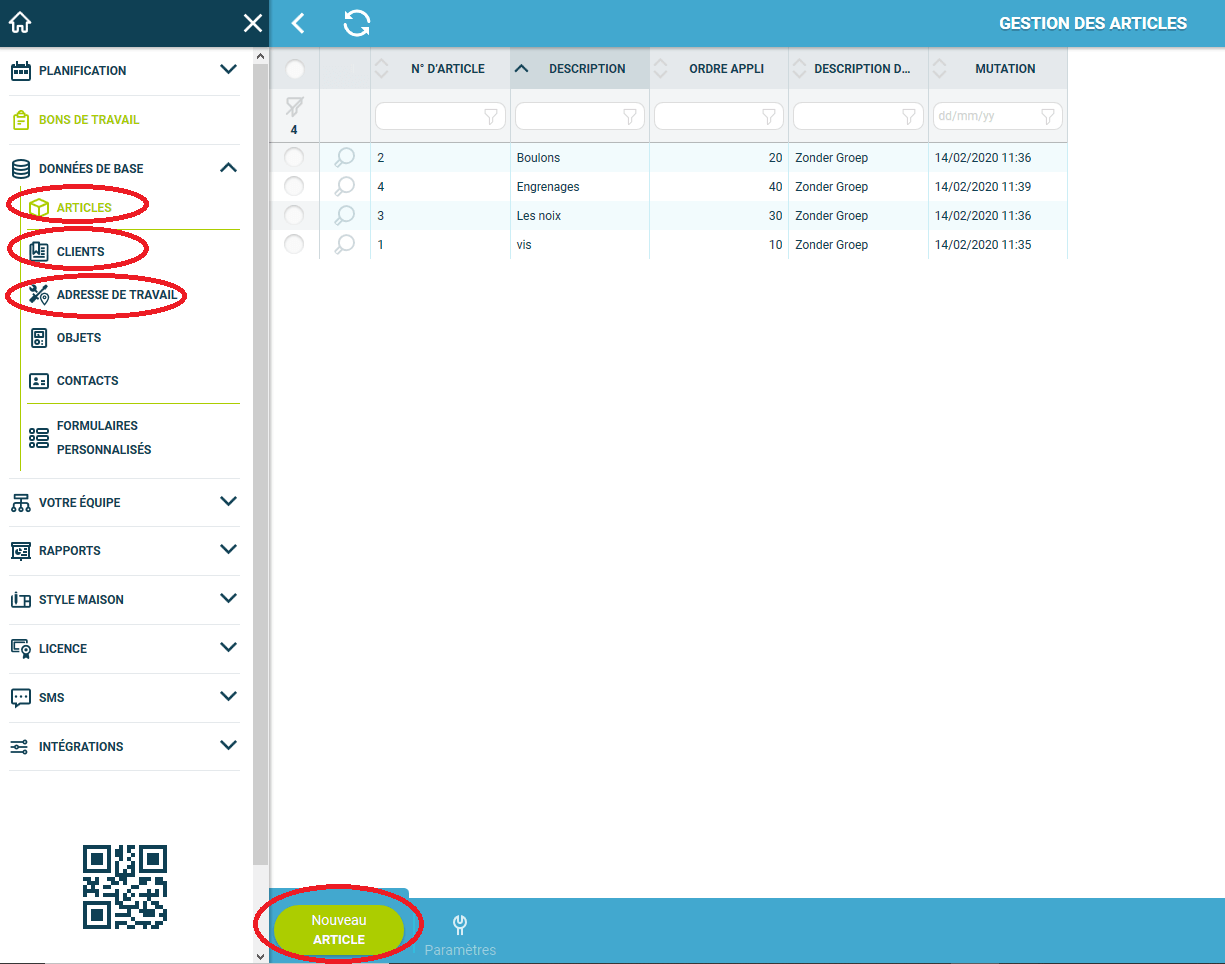
3. Add articles, customers and work addresses.
Fill your Simon environment with master data. Go to Basic data, from there you can add customers, work addresses, articles manually or via an Excel import. You can also add your own forms, objects & contacts here. The articles you enter here are available in the Simon App to register used articles on a work order.
Note: If you make an integration with an accounting package yourself, the basic data will be automatically filled from your accounting package.
4. Plan a work order for your field employee.
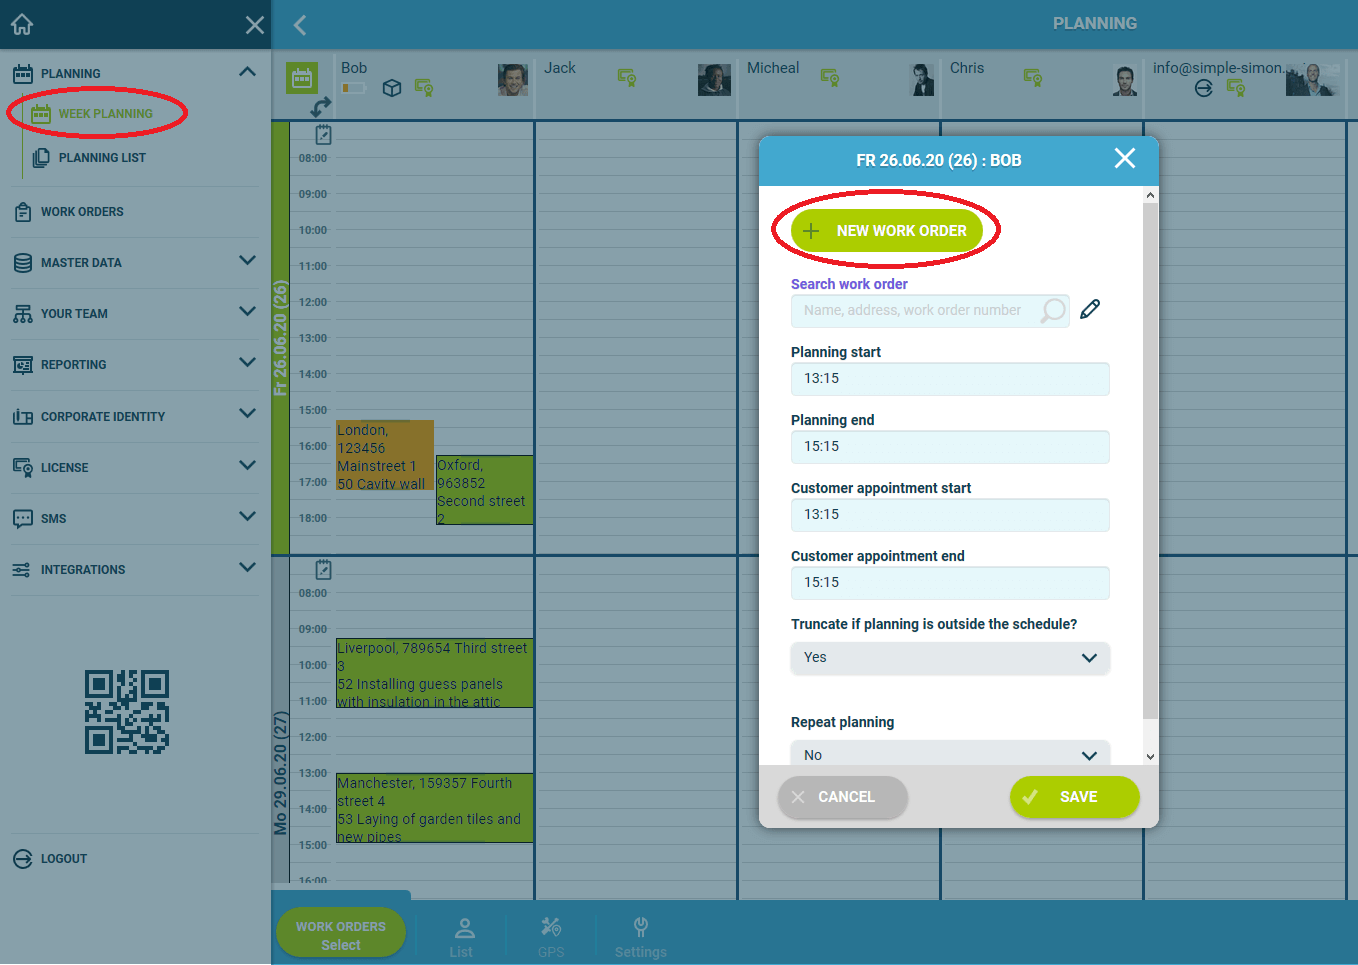
Go to Planning -> Weekly planning. When you move your mouse over the schedule, you will see that the mouse changes into a + sign. Click anywhere on a day/time to schedule a work order.
5. Create or select the work order you want to schedule.
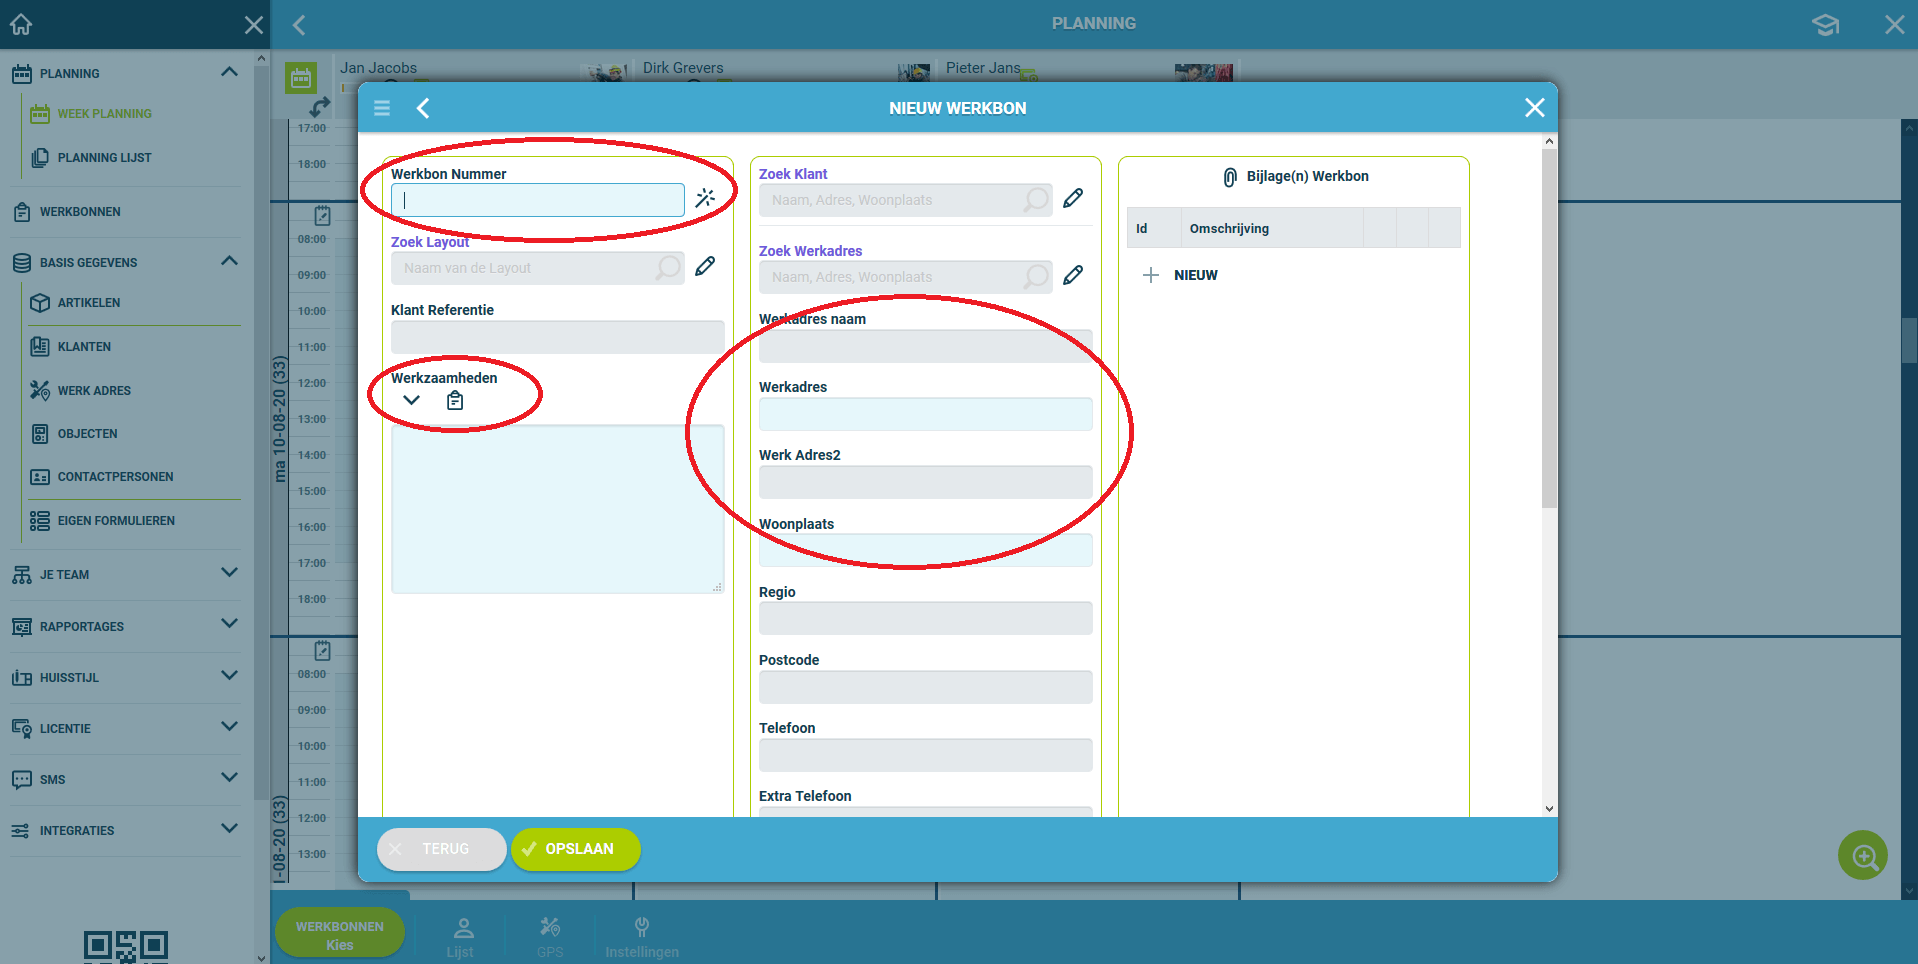
You can create a new work order by clicking on “New work order” or select an existing one at “Search work order” to place in the planning.
6. The work order is now scheduled.
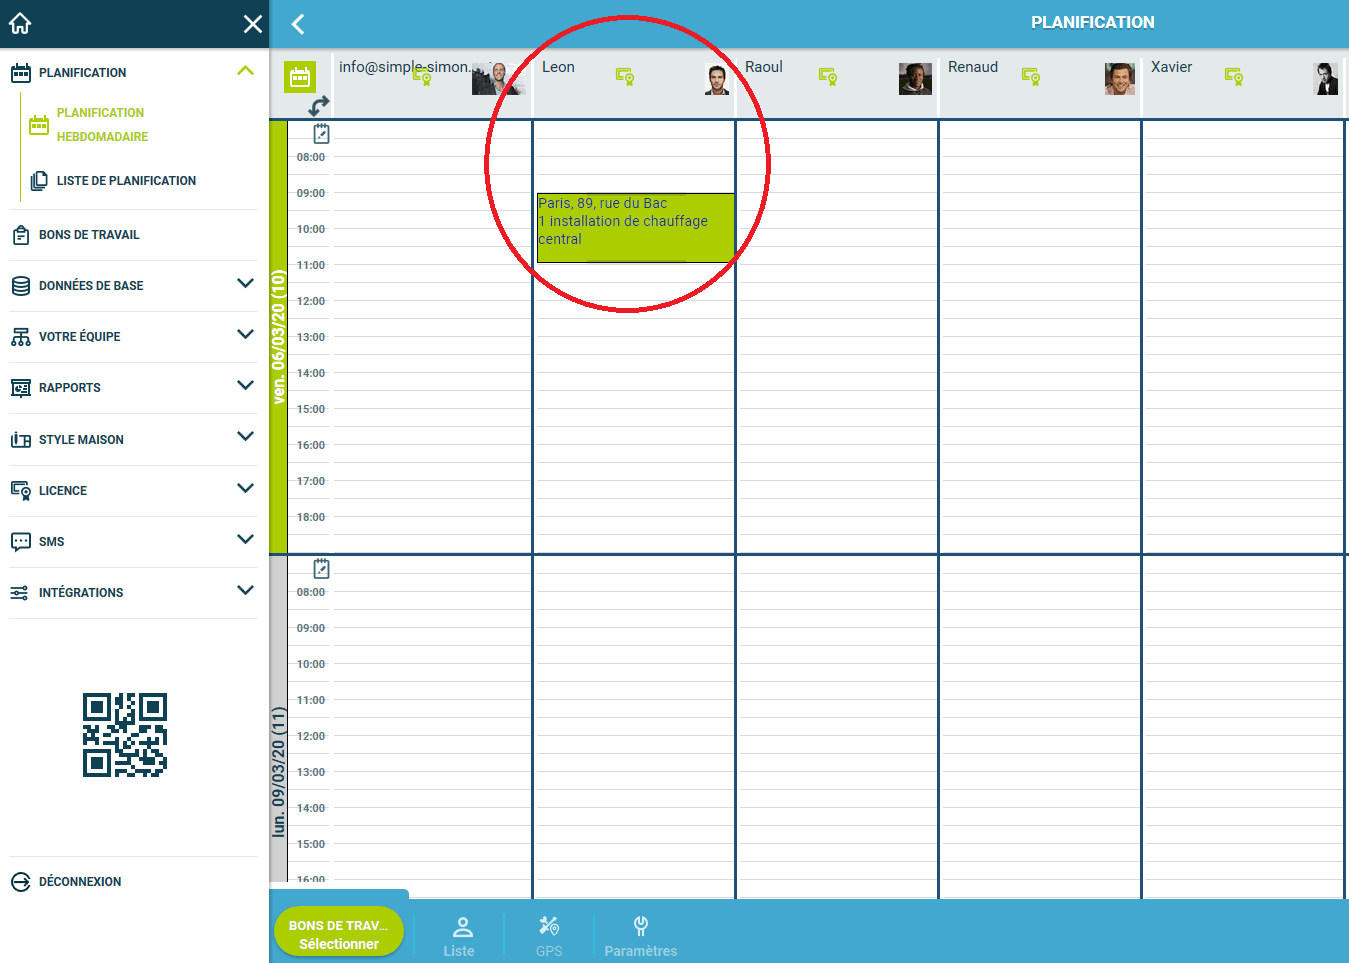
You will now see that the work order is visible in the calendar of the fieldservice employee. This planning is connected in real-time with the Simon App. If you plan a work order here, it will automatically appear in the planning of your field employee.
Simon App (Field Service Staff)
7. Handling work orders in the Simple-Simon App.
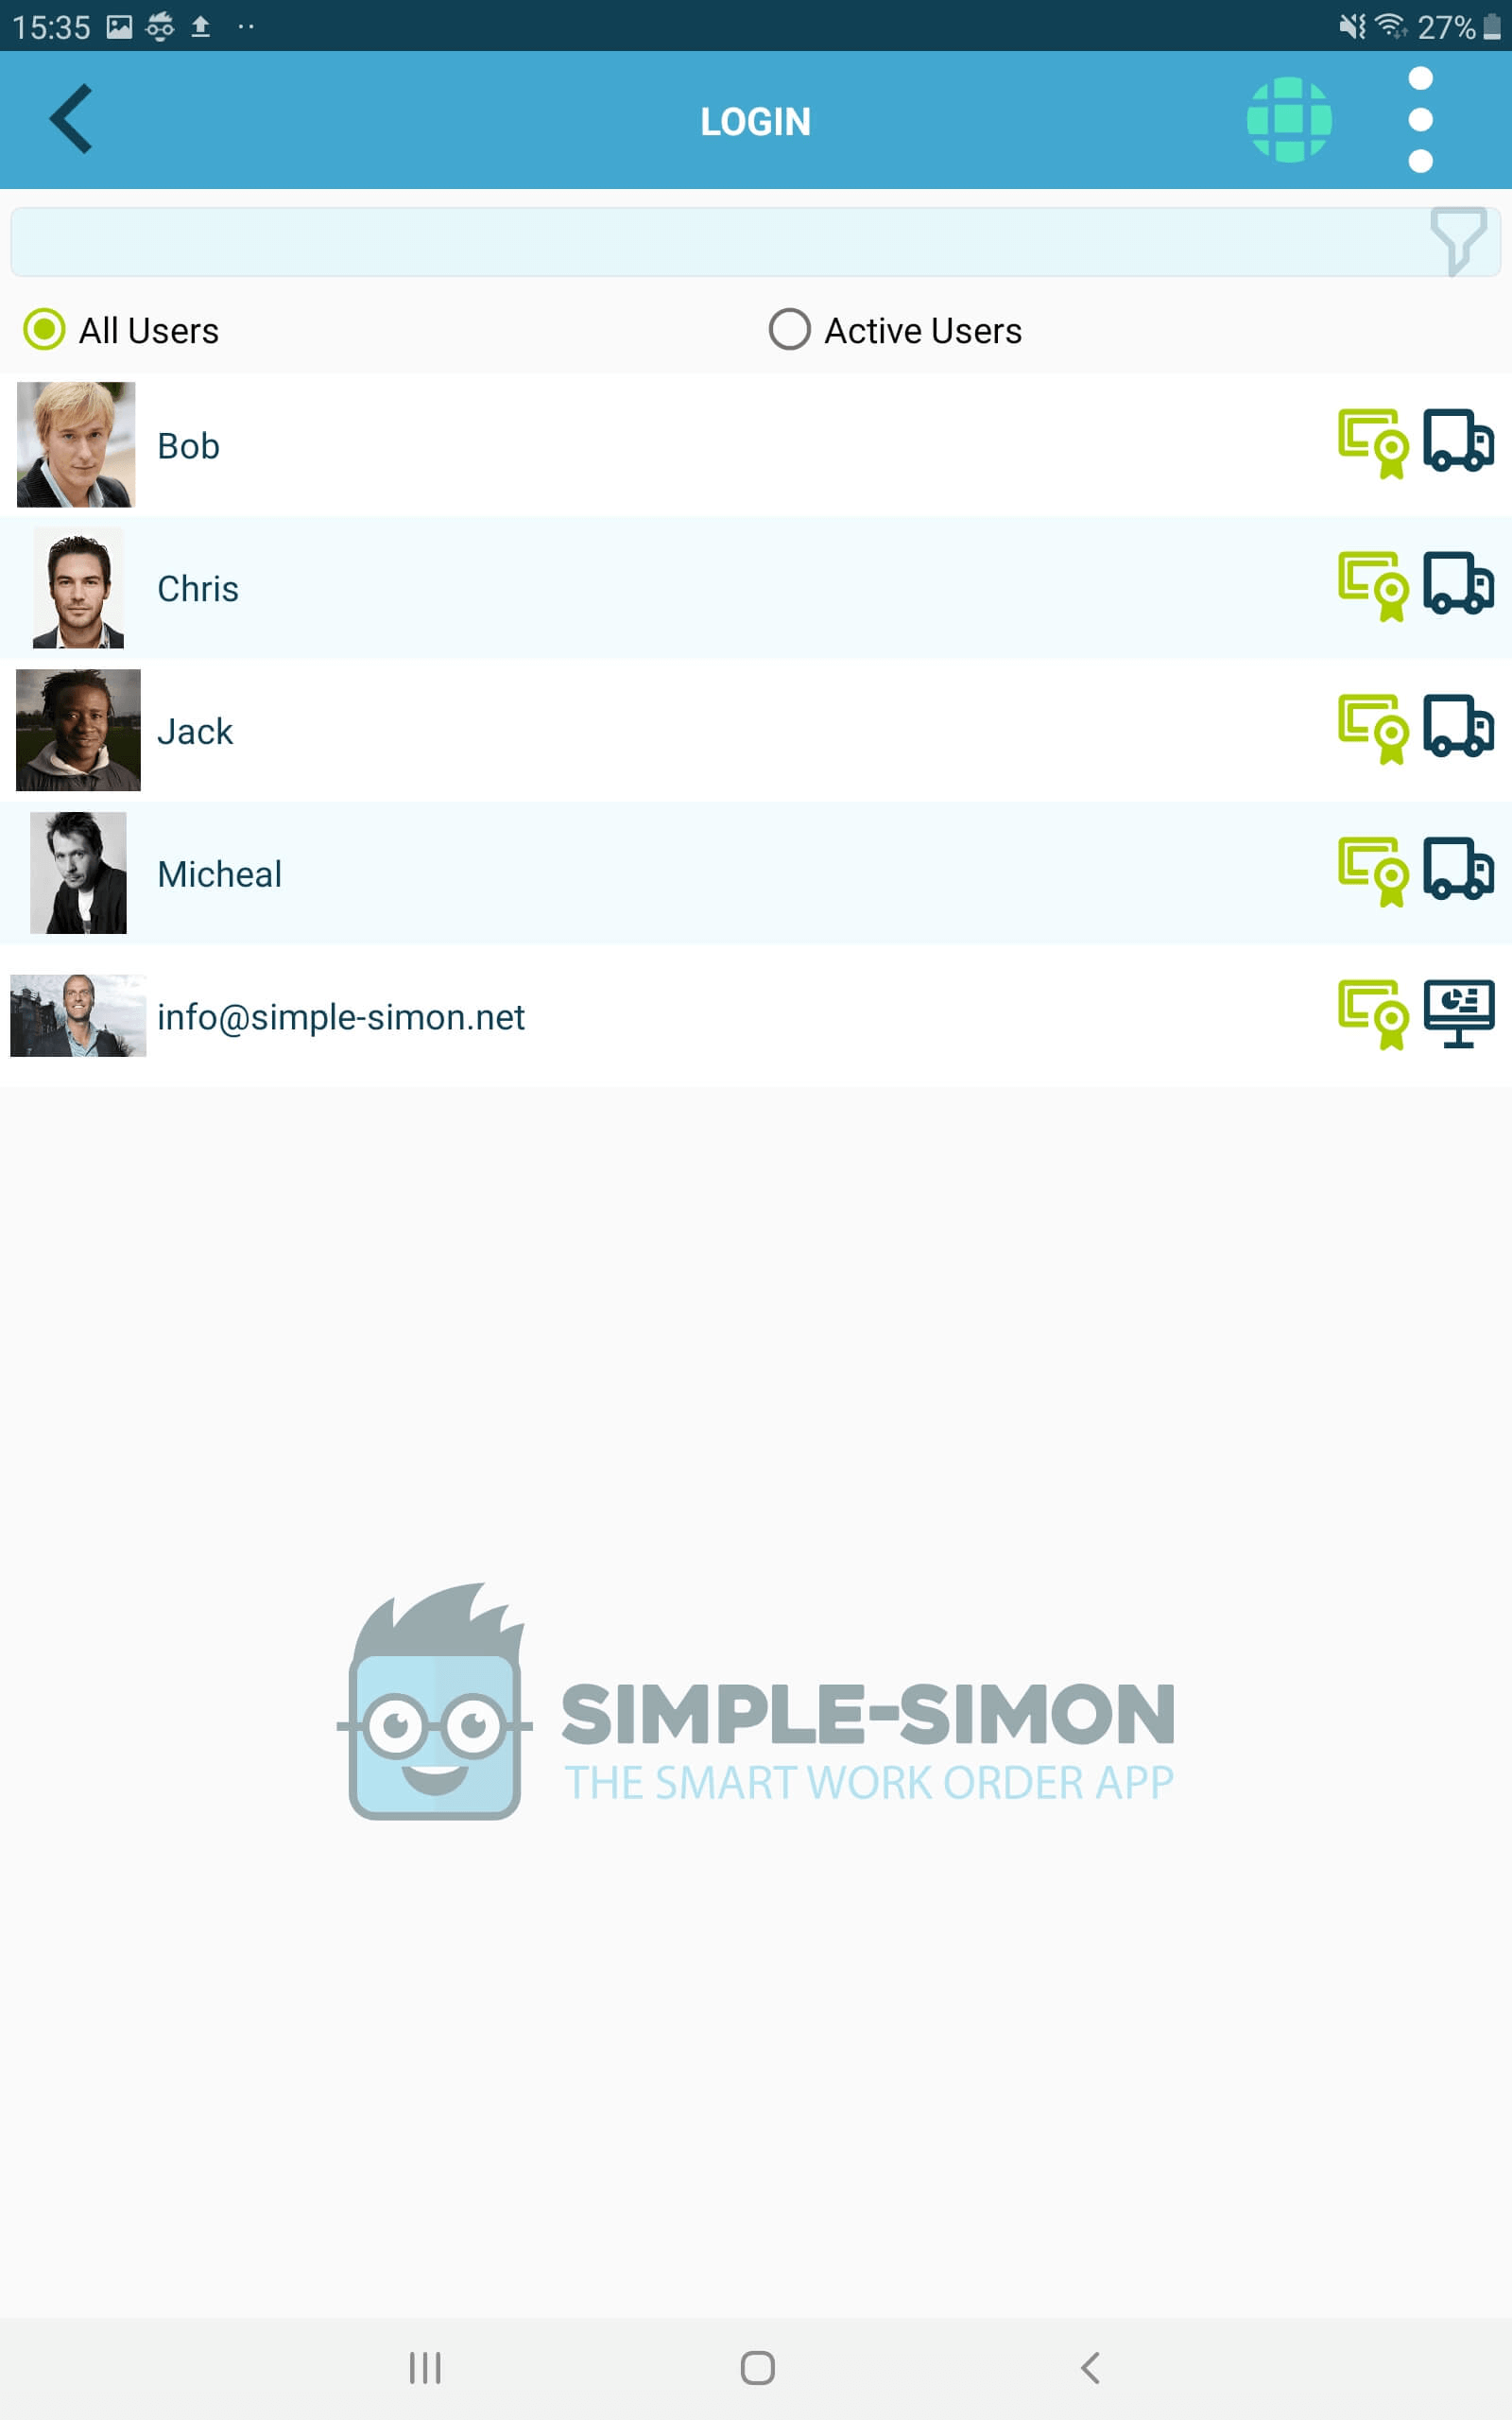
Make sure the App has been downloaded and connect it to your office module (once). You can connect the App to your office module in various ways (fill in request email address, scan QR code, enter office key).
Now that the App is connected to your office module, you can log in. Once logged in, you will be taken directly to your personal planning board and you will see your work orders in the planning. From there you can select the work order and start working!
8. The planning board.
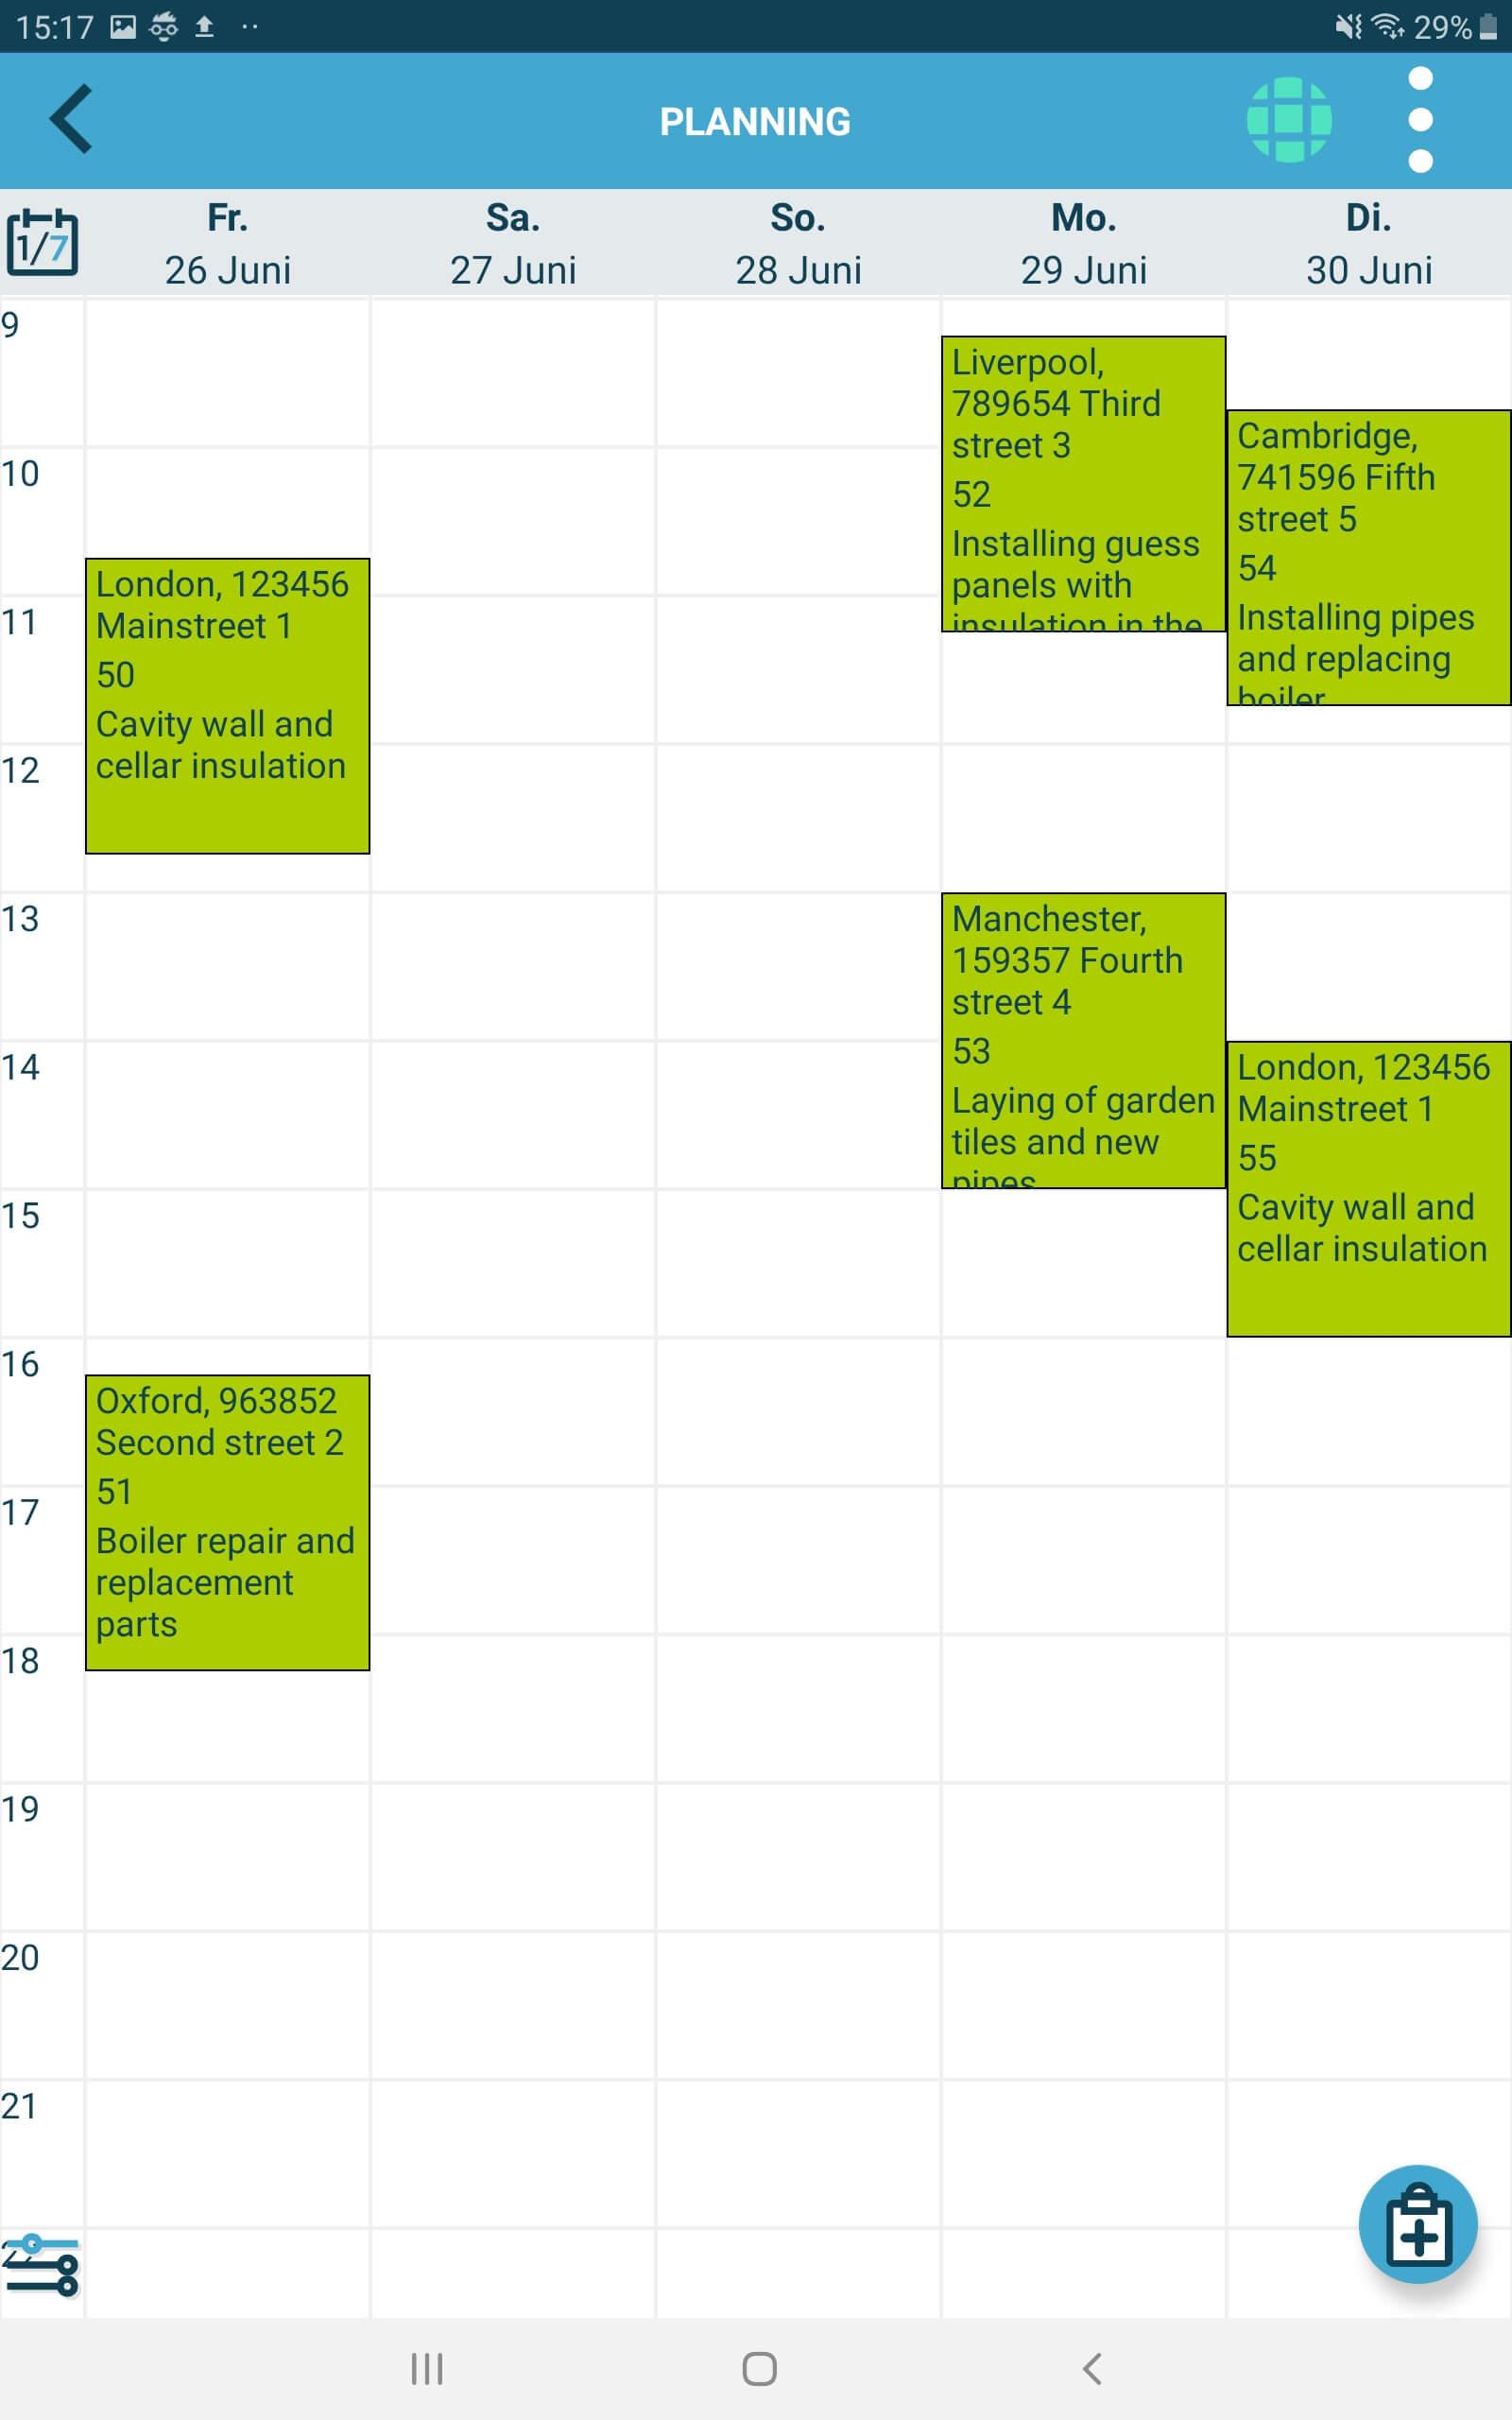
If you are logged in, you can immediately view your schedule and see which work orders have been scheduled for you. You can also change the view to “day view”. Click the calendar icon in the top left corner to switch the day and week view.
If you want to schedule work orders on the go, click on the + sign at the bottom right. From there you can create a new work order or select an existing work order to schedule.
9. Start with your work order.
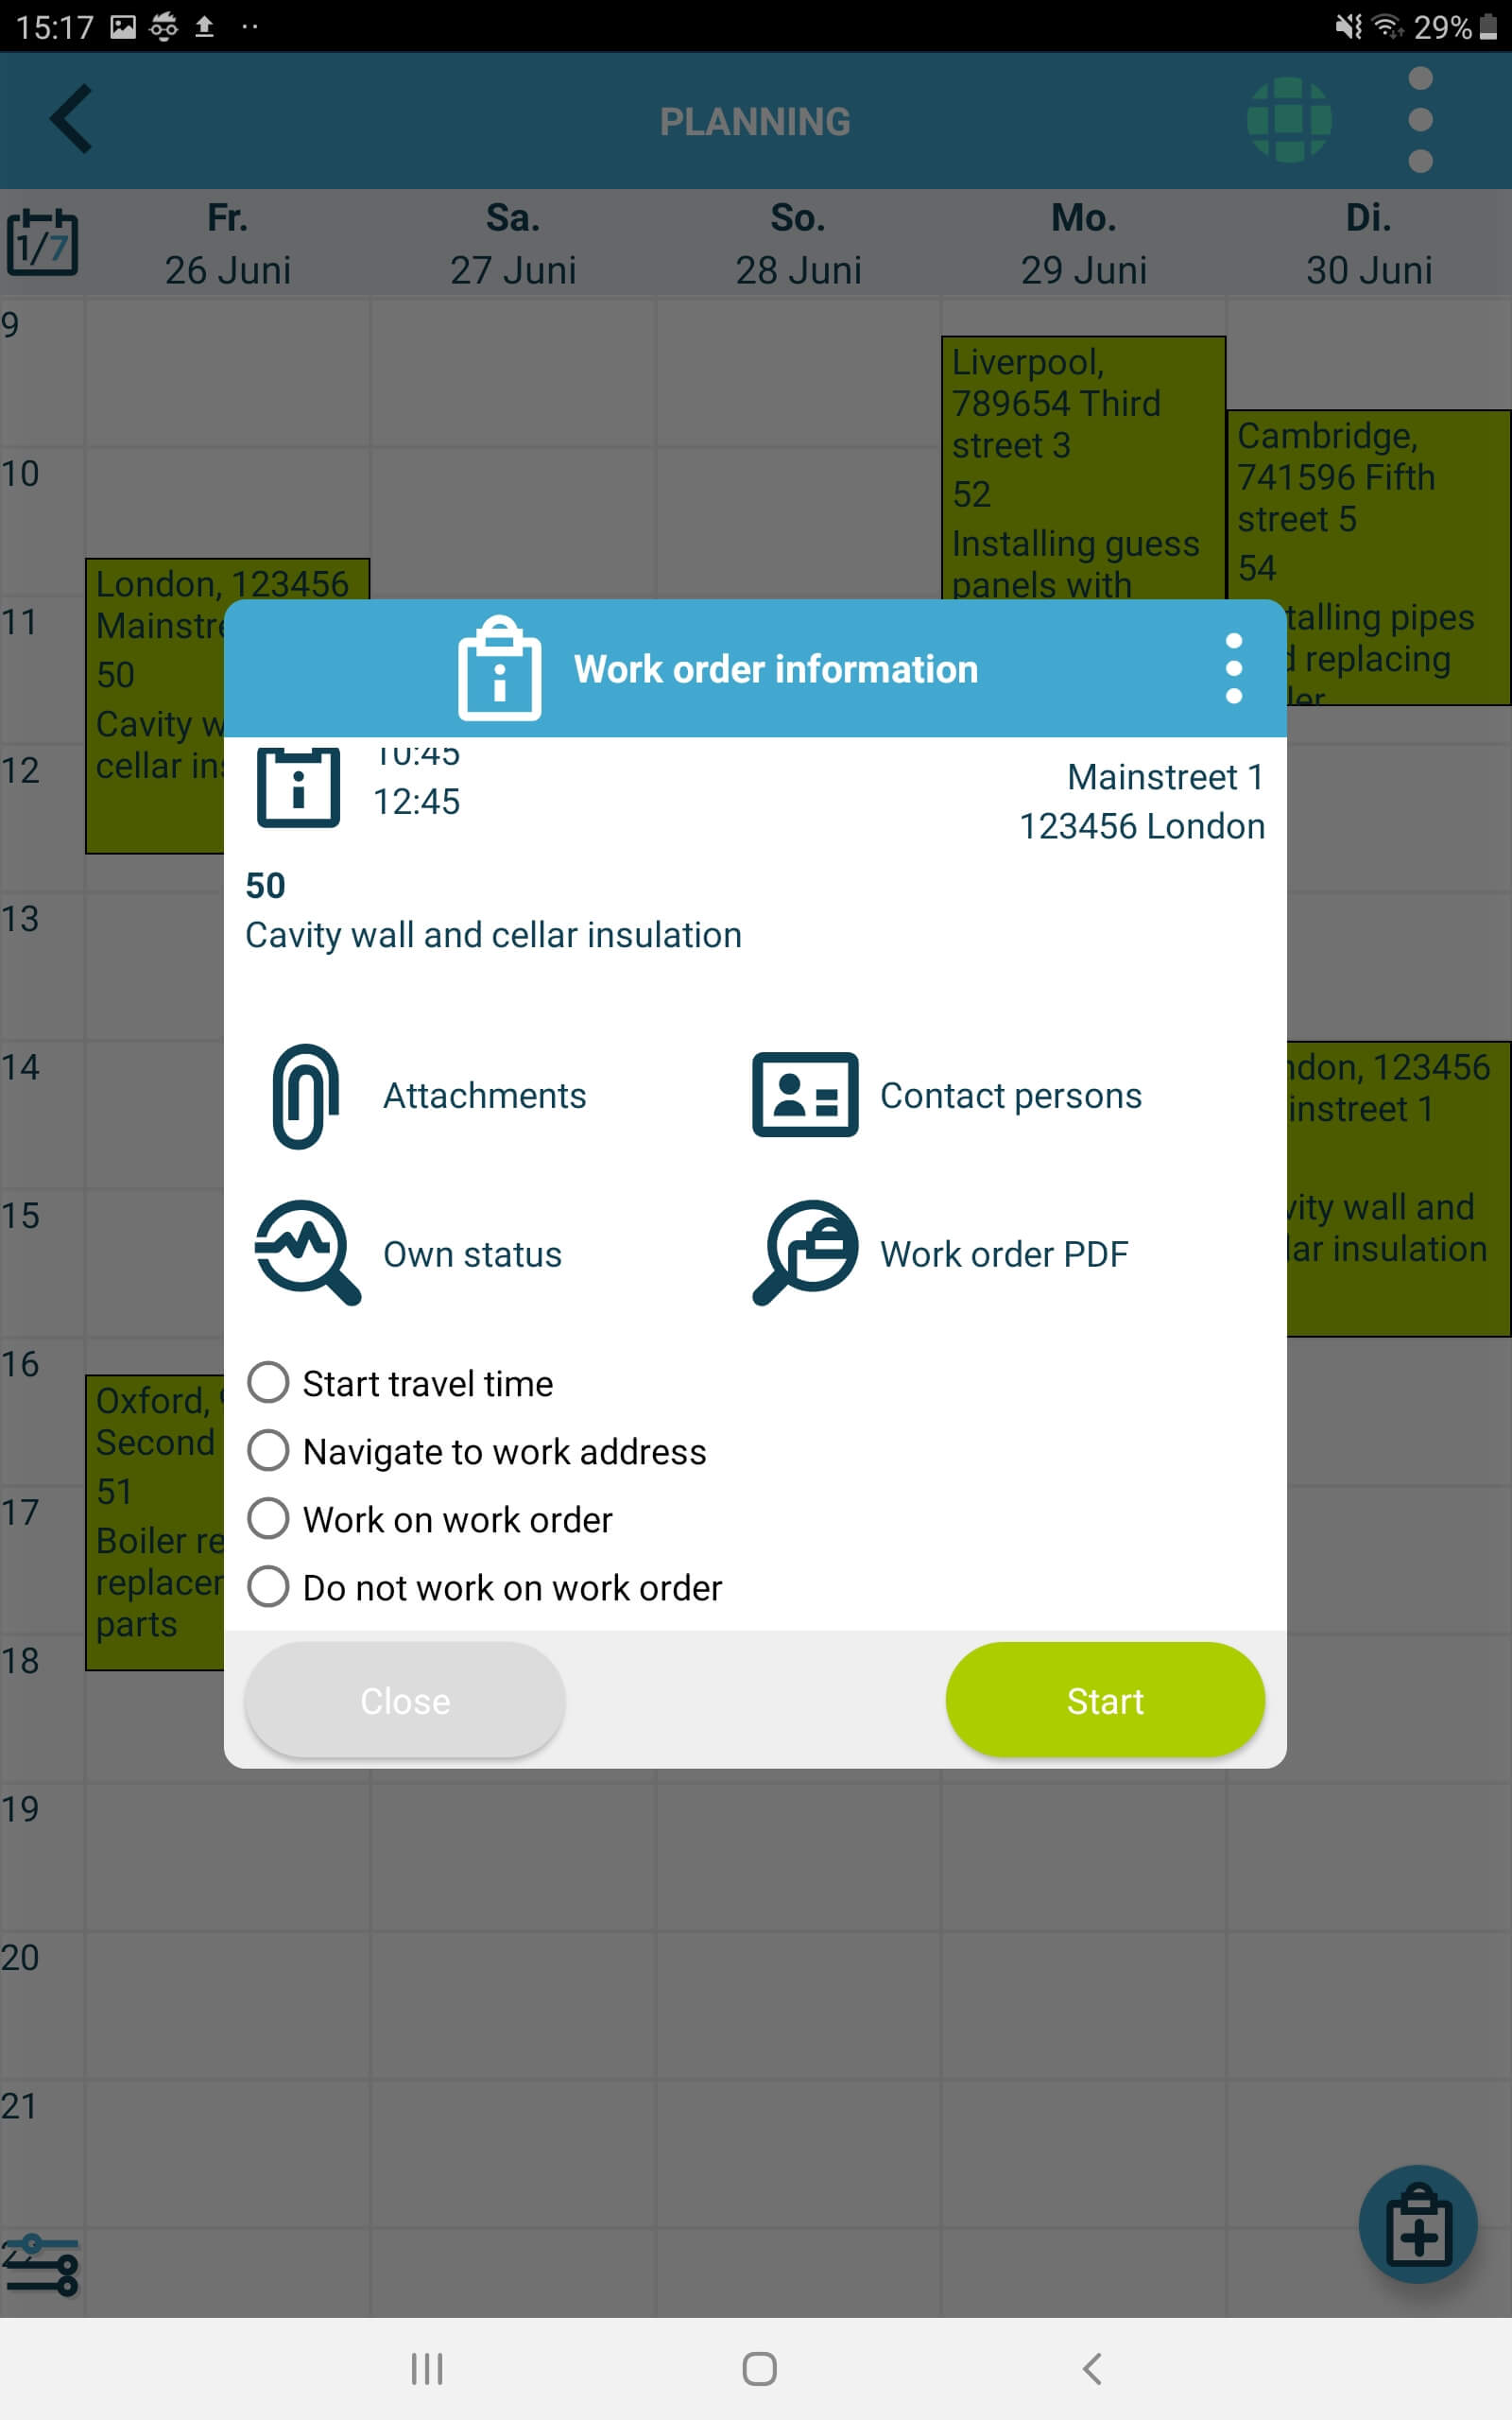
To get started, click on the work order that is in your schedule. From there you will see more information from your work order and you can immediately start registering your travel time and/or working time. You can also navigate to work address via Google maps, Waze or Apple maps.
10. Track work time.
In this example, we assume that you have arrived at the work address and that you will immediately start working on the work order. So you can also first select “Start travel time” or “Navigate to work address”, then the travel time will be tracked.
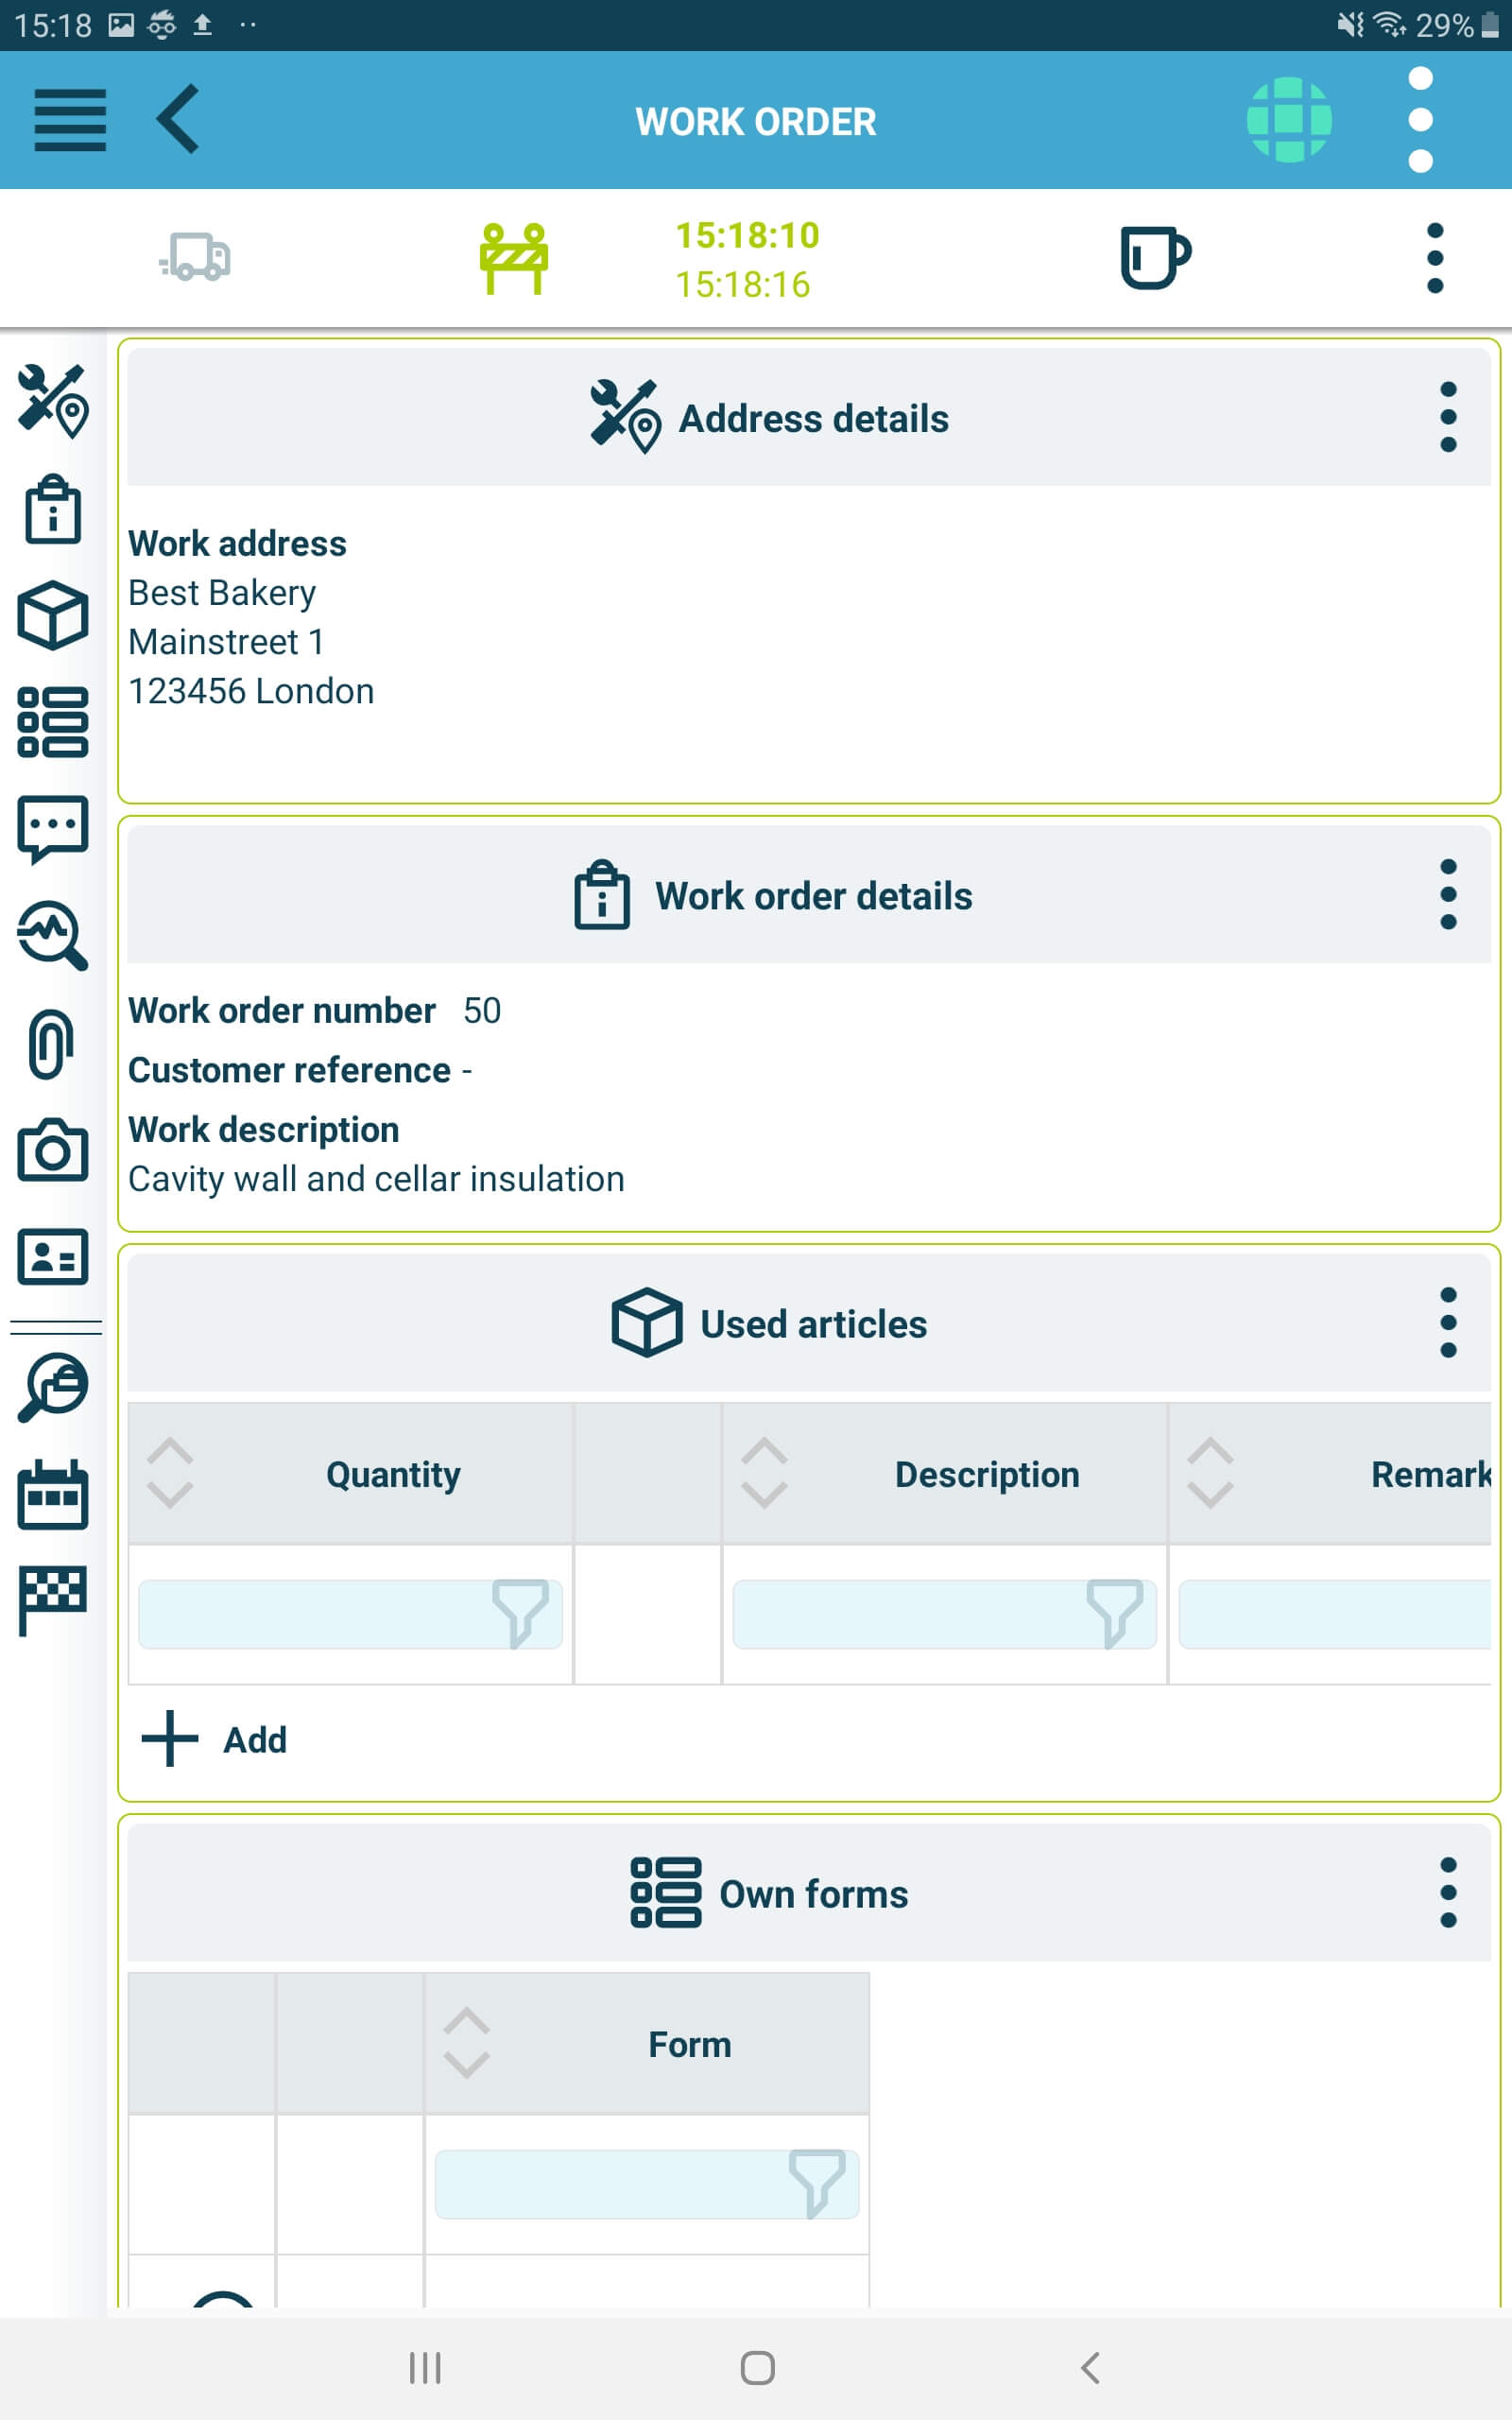
Since we’re getting started right now, you can see at the top that working time is being tracked in the background. If you click on the coffee cup symbol, the break time will be tracked. Once you’re done taking a break, you can continue to record work time.
11. Register articles.
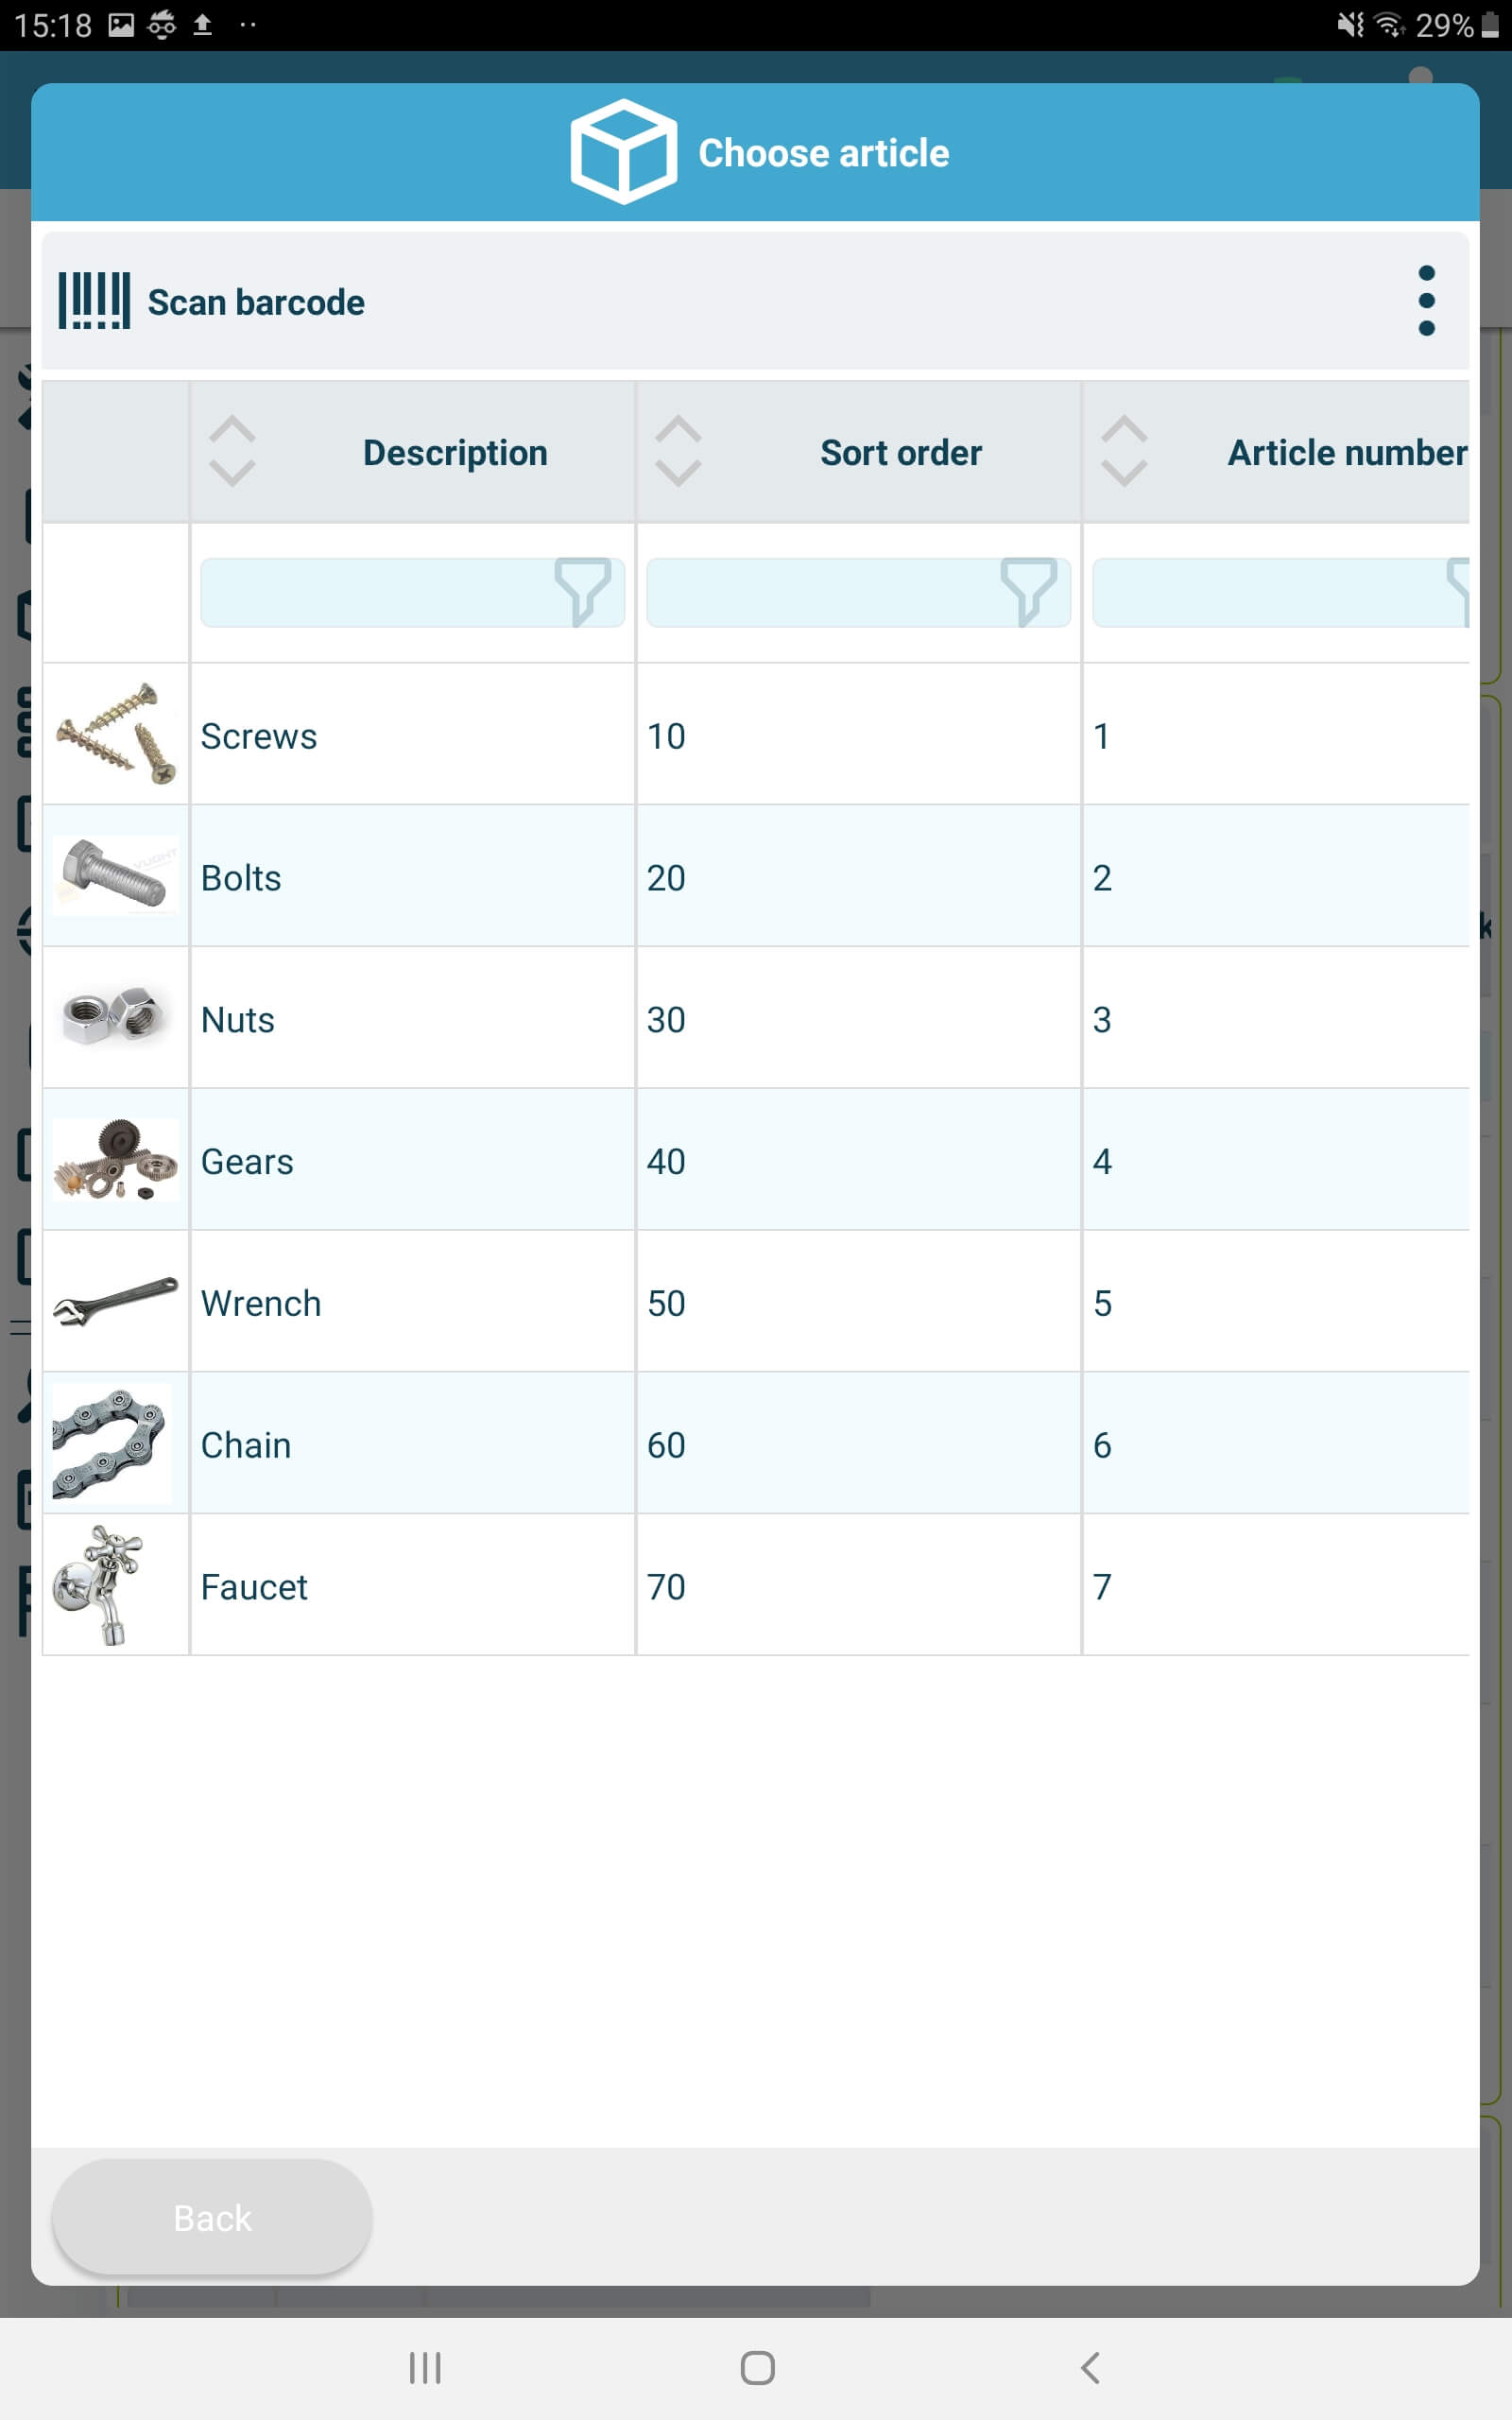
Click on add under the heading “Consumed items”. On this screen you can indicate which items you have used during your work. The articles you find here were first added at the office as basic data. You can also scan barcodes to quickly find the right item.
12. Own forms.
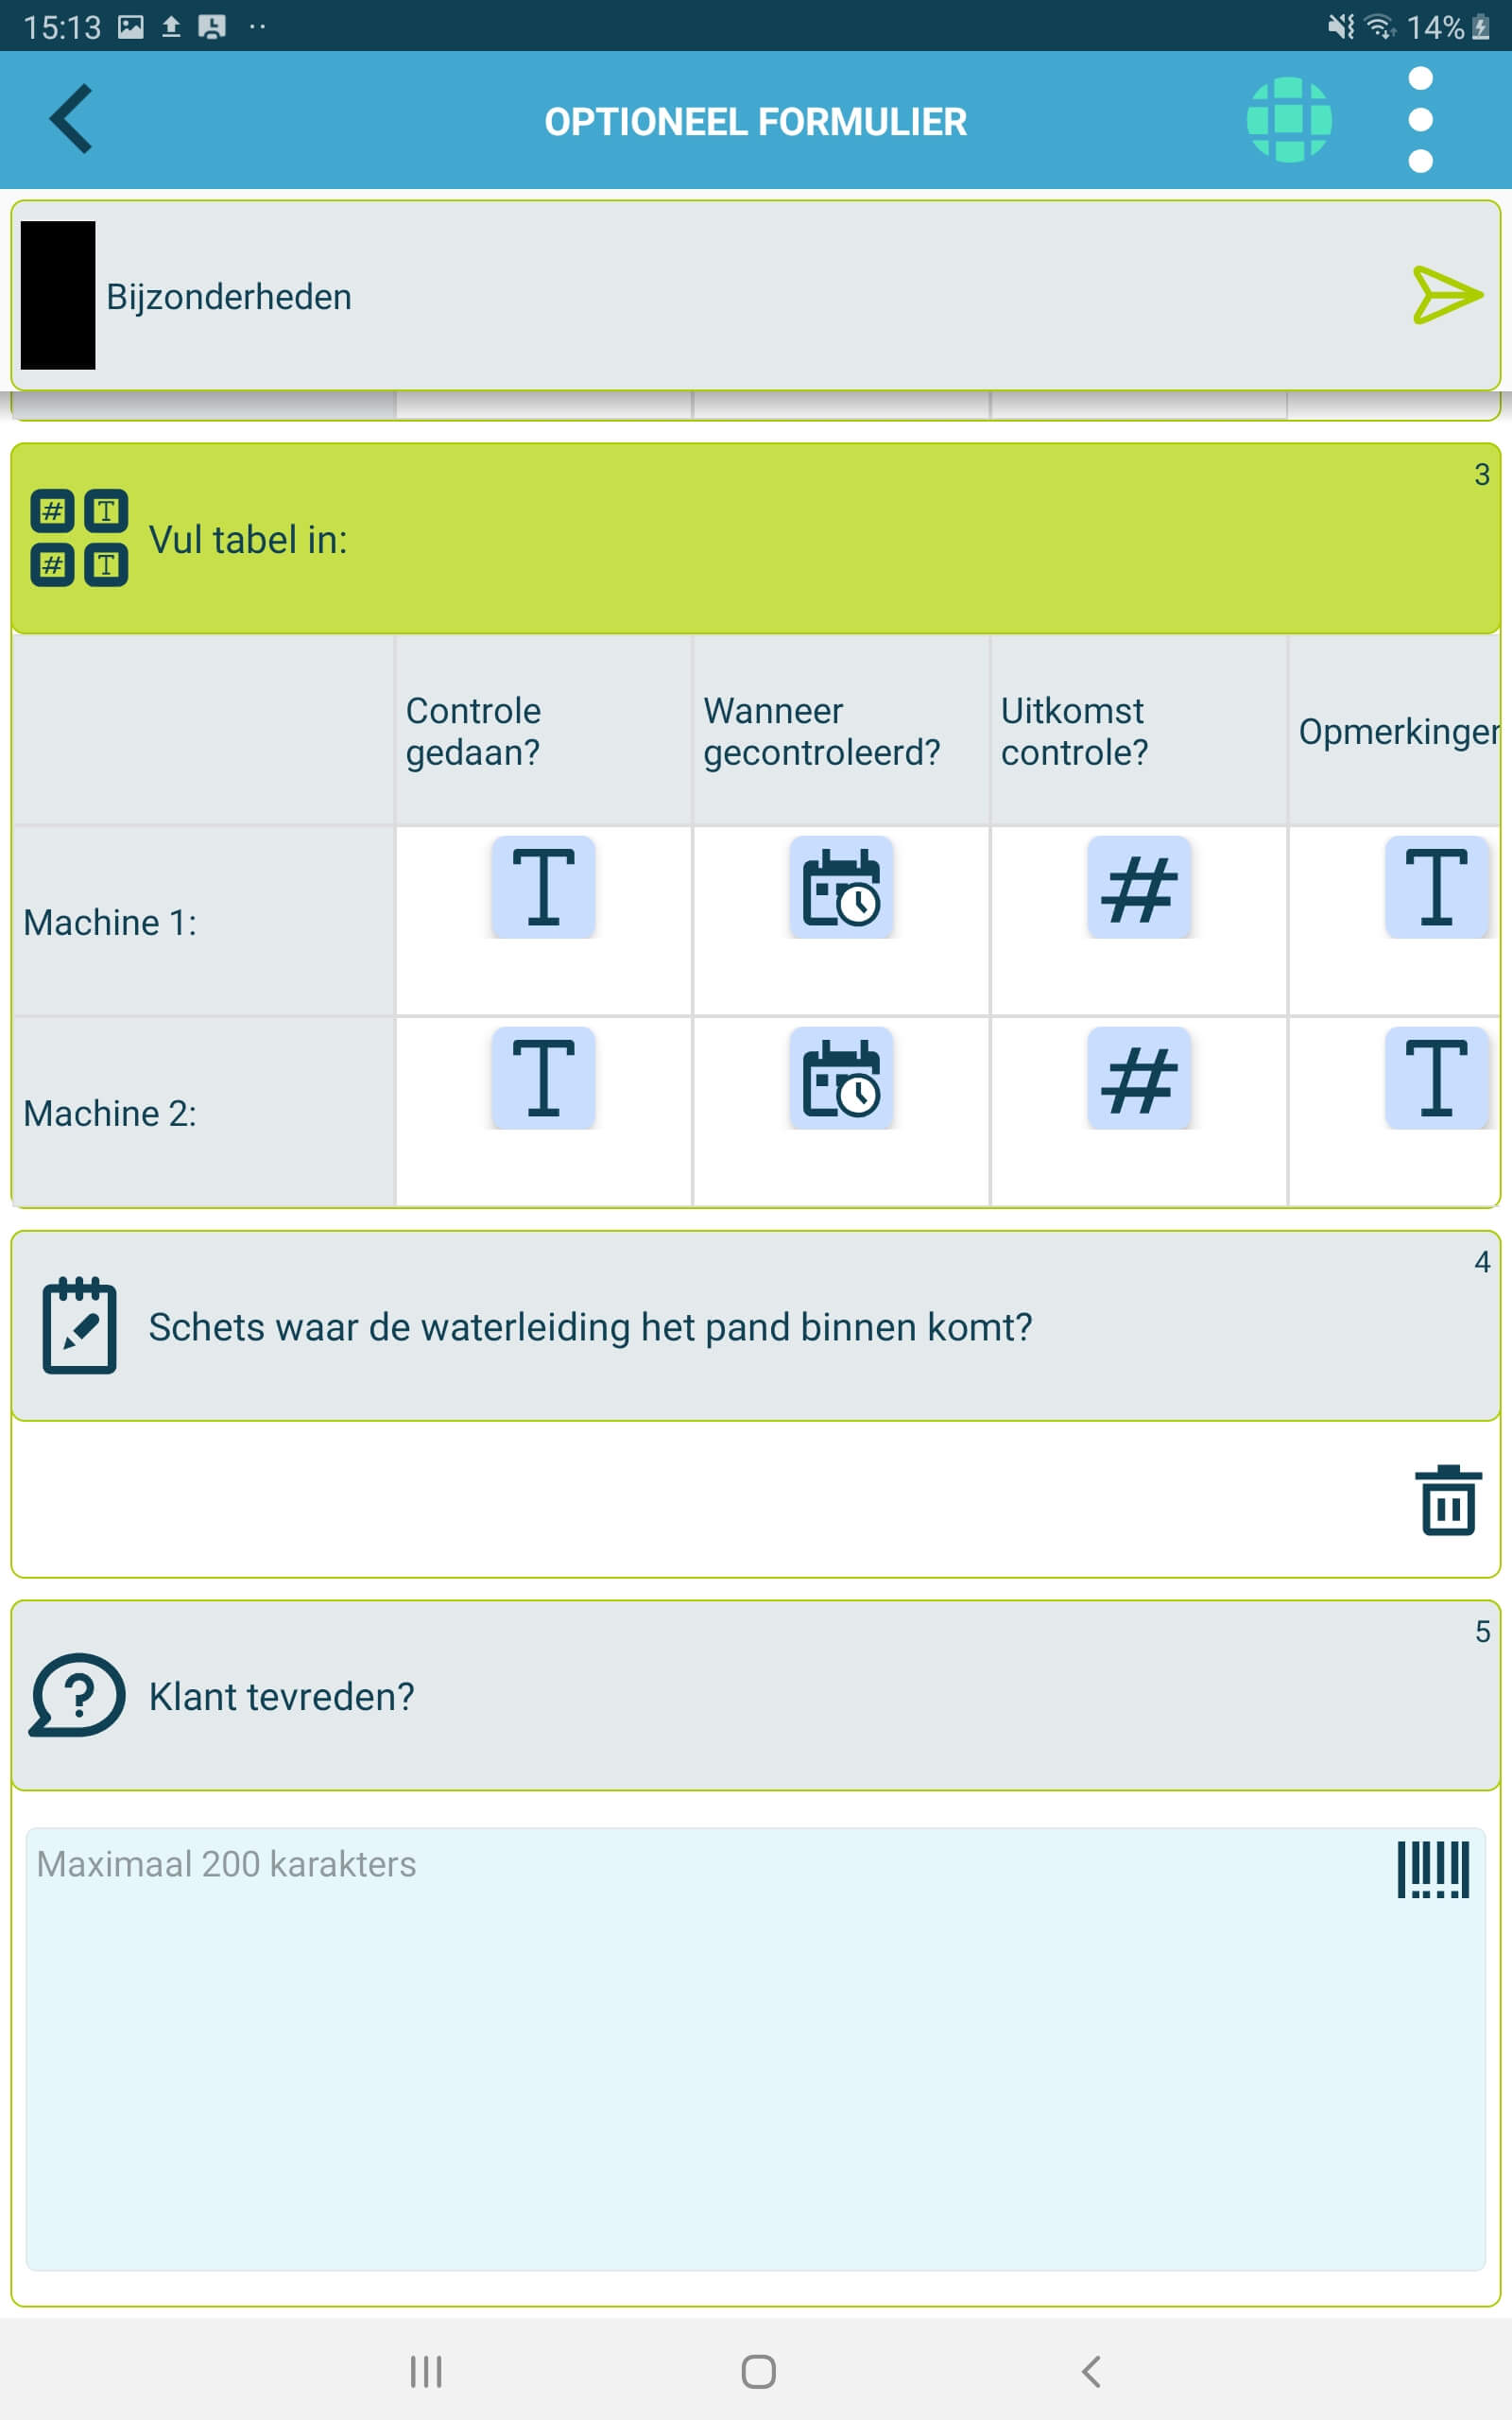
In the Office module you can also add “Own forms” under basic data. These own forms can then be filled in by the field staff. This gives you extra information about what happened in the field. You can process photos, checklists, table with values, sketch, open and closed questions. Customers use this for maintenance lists, installation report, delivery reports and much more.
If you have added your own forms via the Office module, they will appear in the work order under “Own forms”.
Click on the form and complete the questions.
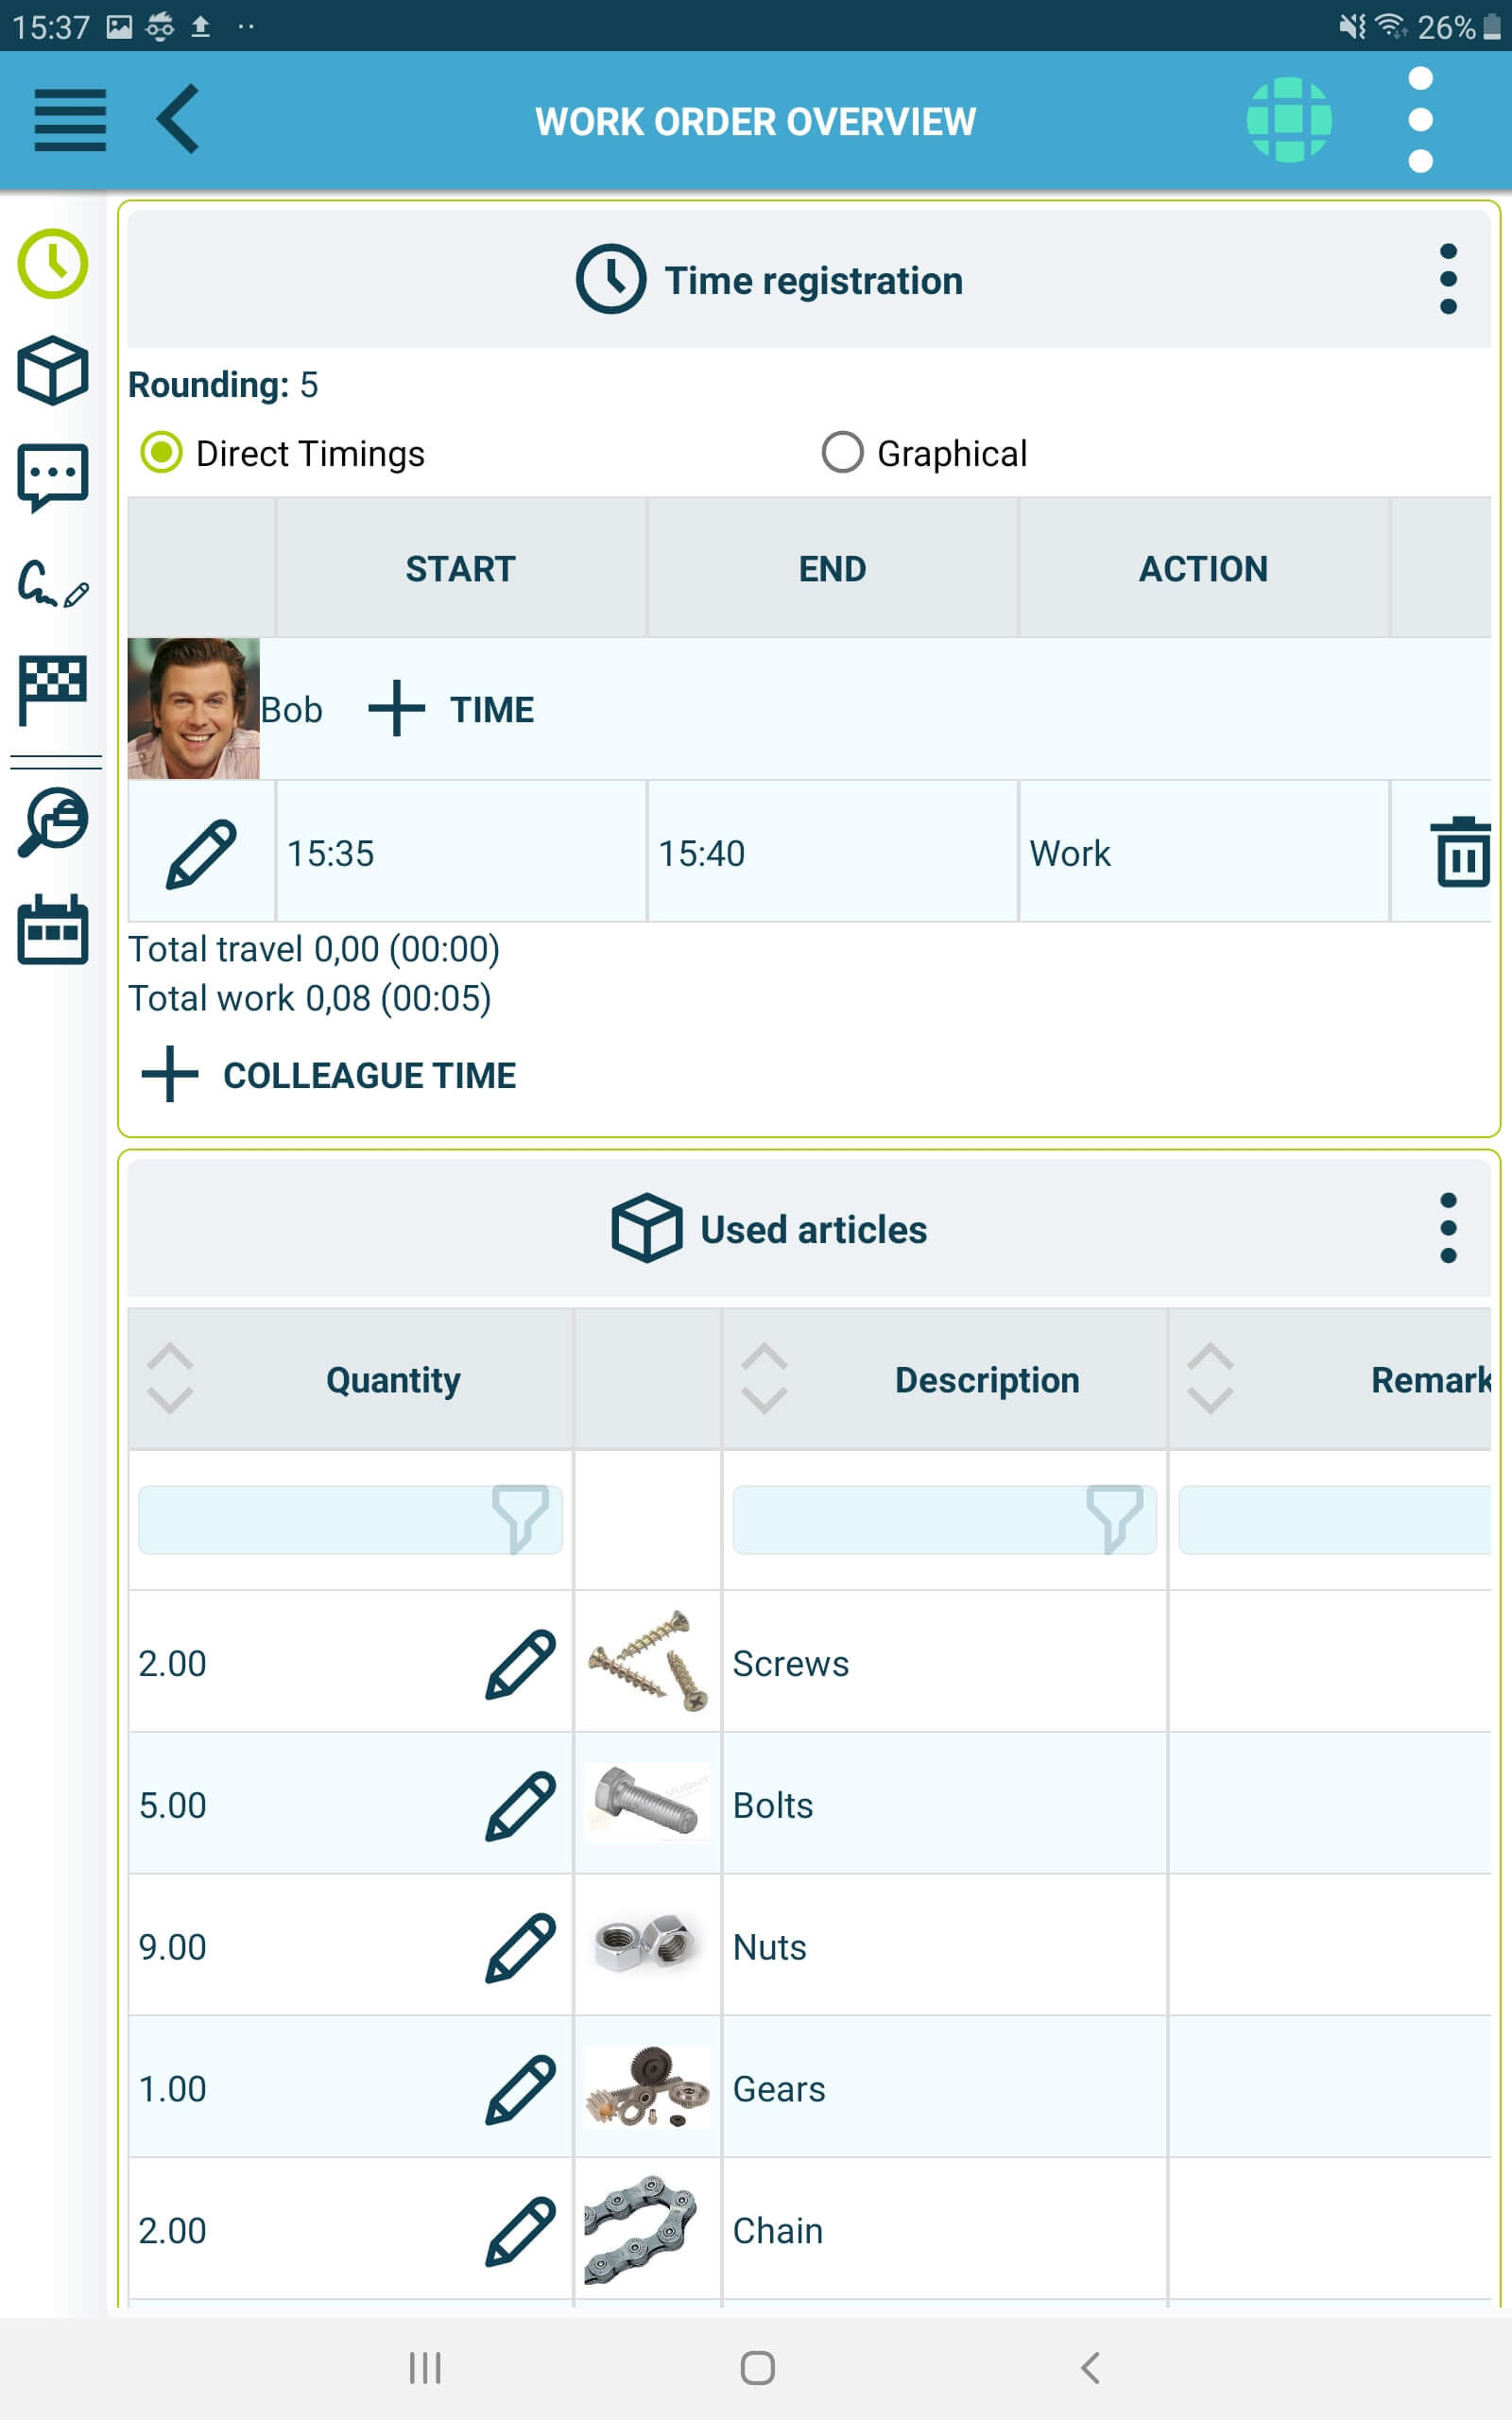
13. Work ready? Click on the finish flag.
When you have finished the work, you can report that the work order is ready. You can do this by clicking on the finish flag on the left side of the screen. You will then be taken to the work order overview. This is a summary of what has been registered on the work order so far. Check that the registered hours and used items are correct and adjust where necessary. You can also add hours of a colleague to the work order and adjust comments. Everything fine? Have the customer sign the work order on your phone or tablet (see step 14).
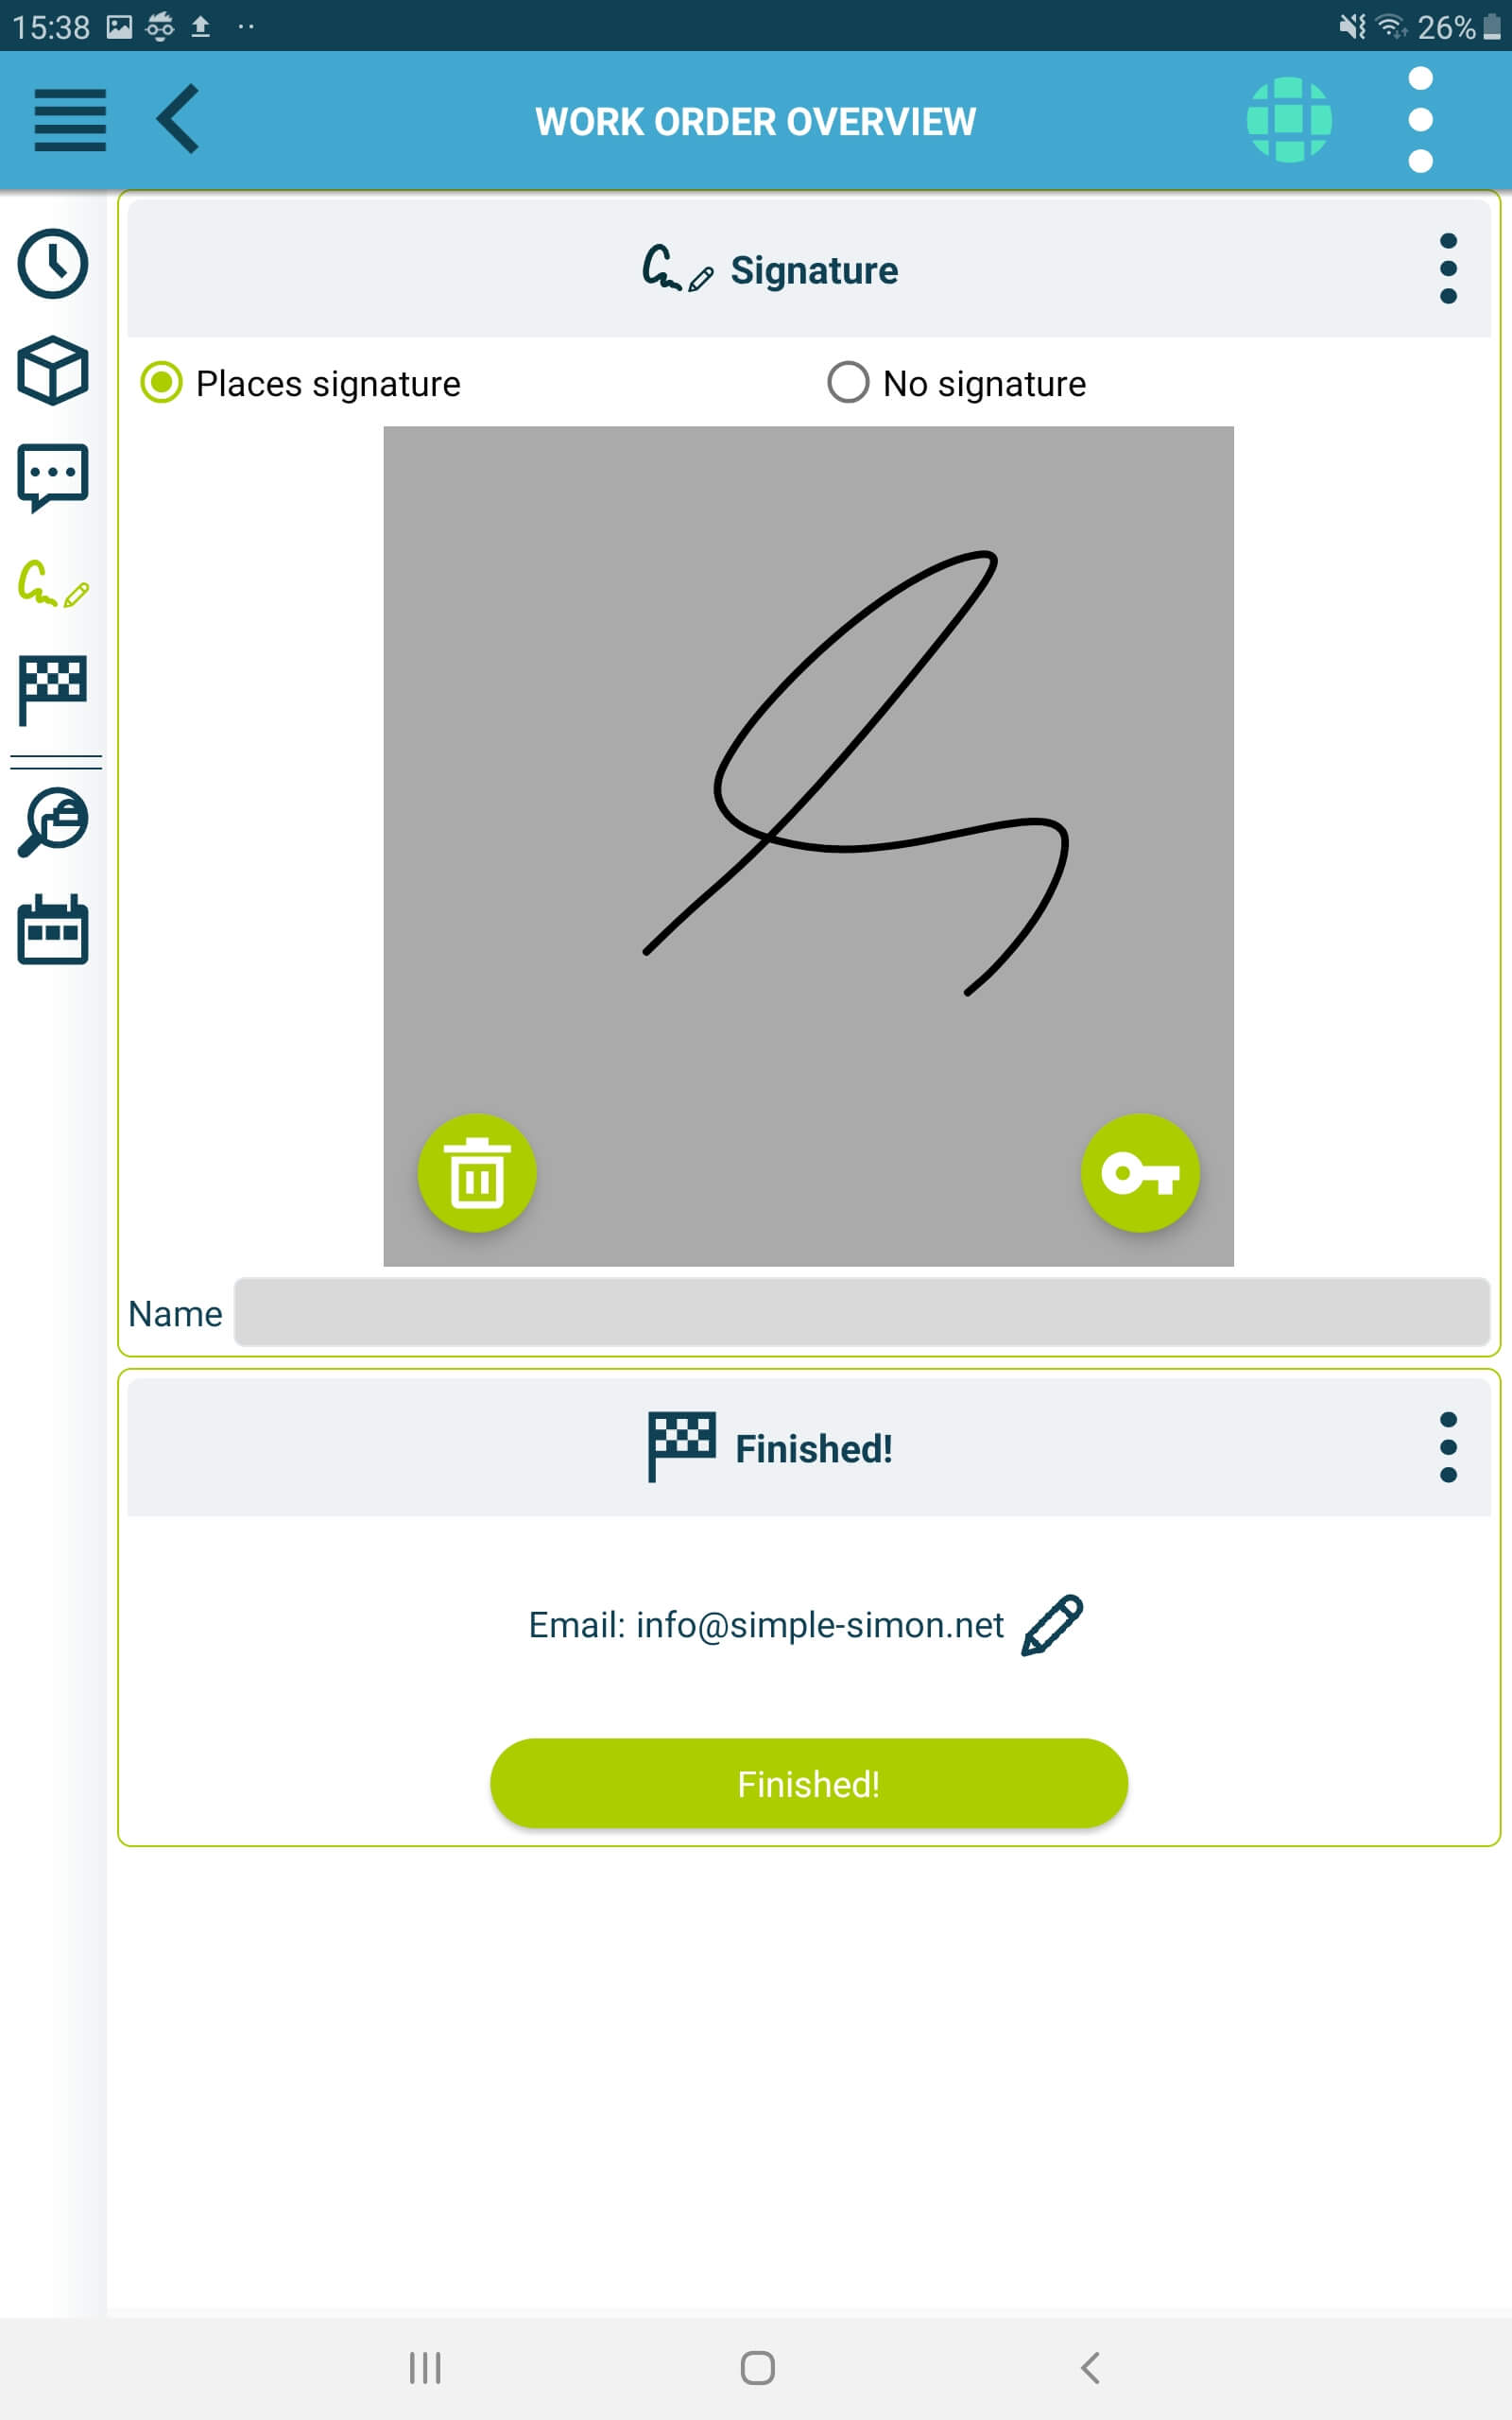
14. Signature.
If everything is correct, you can ask the customer for a signature. Click the pencil icon to add a signature. When the customer has signed, you can also send the work order by e-mail to the customer or to your own e-mail address.
As soon as the work order has been reported as ready, it is immediately visible in the office module and can be checked/handled as desired.
This is it, you have just successfully scheduled and completed your work order. If you need more information, please contact us: support@simple-simon.net.

Integrations
Simple-Simon can be integrated into various accounting software packages. Work even easier and faster by integrating Simple-Simon into your accounting package. You can (depending on your accounting software) import item and customer data into Simple-Simon and use this data directly in the work orders. If the work order is archived in the Office module, it will be sent back to your accounting program as a draft invoice (depending on your accounting program). This way you can invoice your customers even faster!
The integration offers our customers the following advantages:
- You can send your invoice faster and you make fewer mistakes.
- Simon automatically purchases all your customers and items from your accounting package
and this is available directly in Simon. - Your work order is completed in Simple-Simon, the archived work order is sent back to your accounting software as a draft invoice or sales order (depending on the accounting package).
- Is your work order ready? Within 5 minutes the invoice can be sent to your customer.
- This makes the processing of work orders effortless, directly saving time and money!
- The integration can be easily created by yourself and is ready within 5 minutes.
- Get started quickly and create a test account for a fully integrated test.
See the integration page for possible Integrations :

